Inkjet Printing on Fabric

I mailed one of my new no-sew fabric postcards to a Postcrossing friend in Italy. In her profile she talked about her passion for creating handmade things including sewing and découpage, and said that she’s always looking for new techniques. 
Wood hyacinth fabric postcard

Wood hyacinth fabric postcard

When she got the postcard she asked for the link to my blog to find out more about printing on fabric. I found an old post that gave an overview but not much concrete info, and it’s high time for me to give you a full-fledged post with the basics of my favorite art process. After you read this if you’re itching to learn more, please check out my Inkjet Printing on Fabric ebook or online workshop.
Printing fabric
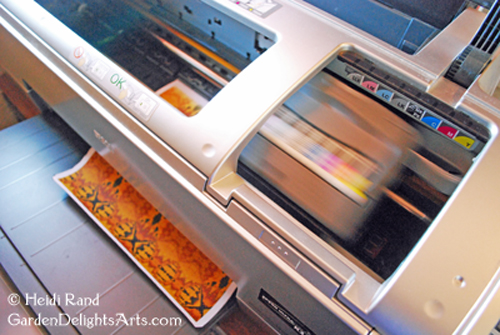
Printing on fabric with your inkjet printer isn’t hard, but knowing a few things before you start will save you lots of time and money. There are two main components: your printer and the kind of ink it uses, and the fabric you’re printing on.
First: inks. To get the lowdown on the difference between dye and pigment inkjet inks and why that matters in printing fabric, go on over to CraftArtEdu to watch my free basic workshop about inkjet inks. Or here’s the really quick version: dye inkjet inks are not colorfast or waterfast, so they fade over time and run when exposed to moisture. Because pigment inks are colorfast and waterfast, they are by far the best option for printing on fabric.
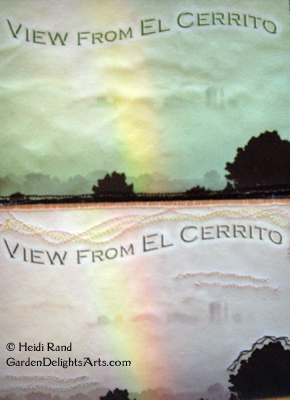
Fabric printing color shift dye ink

Dye ink prints: colors fade and shift

Second – you need to choose what kind of fabric to print: (1) untreated, (2) fabric that you treat yourself, or (3) pre-treated commercial fabric. There are pros and cons for each, and what you want to use the fabric for is a factor, but in this post I’ll tell you about commercially pre-treated fabrics, because they’re the most versatile and give the best results for most purposes.
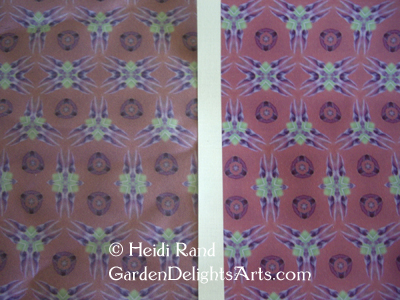
Untreated vs pre-treated fabric

Untreated vs pre-treated fabric

Pre-treated fabrics are backed with paper or plastic to stiffen them so they’ll go through your printer without crumpling up and jamming your printer. You want the fabric sheet as flat as you can get it so the edges don’t catch as the printer heads go back and forth, which can make the fabric shift or leave ink on the edges.

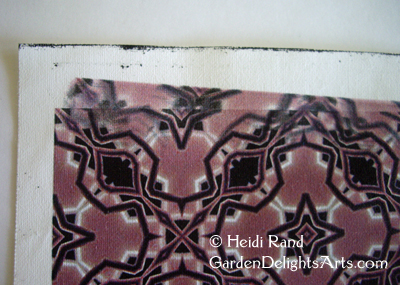
Fabric shifted in printer

There are a lot of different ways to flatten fabric — some tips: try curling it the other way by hand, flattening the sheet under a stack of books, or ironing it.

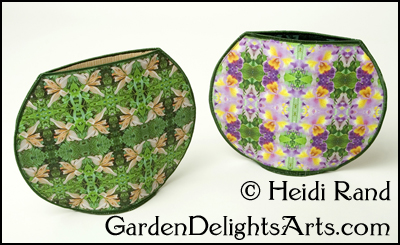
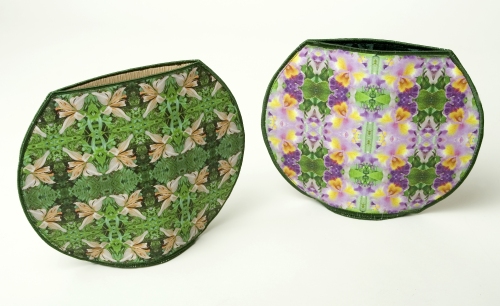
With so many pre-treated products to choose from it’d get expensive fast to sample them all to find the ones that work best for you. I advise starting out with a few that let you buy small quantities so you can test and compare. I’ve tried most of them, and my favorites for printing with pigment inks are Cotton Satin and Cotton Lawn by EQ Printables. The fabric feels wonderful and the quality of the print is great. In my opinion the plain EQ Printables (the package says only “Inkjet Fabric Sheets”) is not worth the money, so make sure the packages are either the Cotton Satin or Cotton Lawn. I also like June Tailor’s Colorfast Sew-in Inkjet Fabric. It’s stiffer than the EQ but the print quality is great and the stiffness can be ideal for certain projects: I use it for some of my fabric postcards and a lot of my home decor creations like fabric vases and bowls, covered light switch plates, etc.

Fabric vases

Fabric vases

After printing all you have to do is remove the backing from the fabric sheet. If you’re using pigment inks there’s no need to heat set or wash; you can use it right away in your sewing or other art projects. However, even though the fabric will feel dry to the touch, it actually takes quite a while for pigment inks to thoroughly dry. If you don’t need to use the fabric right away you’ll get best results by putting it aside for a week or so.

That’s it for the basics! If you want to learn more this is the link to my blog post about my ebook “Inkjet Printing on Fabric.” My website has a page with links to all of the different options to find my ebook, including the kindle version where you can see a preview of the book.

 Or click here to go to my online workshop on CraftArtEdu, which also includes a free preview.

Lars quilt

Lars art quilt, made with different kinds of printed fabric

No Sew Fabric Postcards

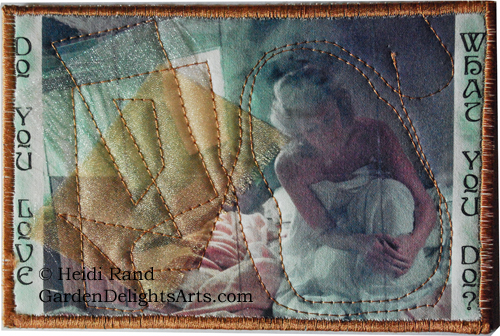
I started making fabric postcards years ago because I didn’t have the sewing chops or time to make bed-sized quilts. Postcards are my way to make very small-scale art quilts with the added wonder that they’re mail-able! Click here to see my 2012 blog post about my fabric postcards. I had been collecting vintage postcards since I was a kid, and once I began to print my own photos and designs onto fabric it was a small hop to sew them into mixed-media fiber postcard form. Here’s an example, my self-portrait photo that I printed on cotton, then adorned with a bit of gauzy fabric and stitching around the design.

Fabric Postcard

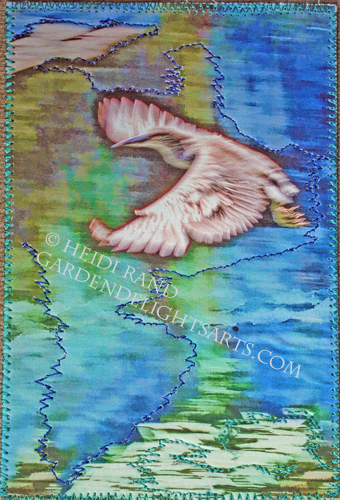
Here’s another, my photo of an egret flying with random stitching around the design lines.

Egret soaring fabric postcard

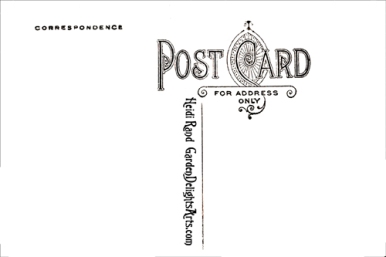
For these fabric postcards I adhere the front to thick stabilizer and then add a backing. I designed this back by scanning the back of an old postcard in my collection, cleaning it up in Photoshop Elements, and adding my name and website.

Fabric postcard back

I print this back onto fabric and then sew the front/stabilizer/back together and edge the sandwich with a satin or zigzag stitch.

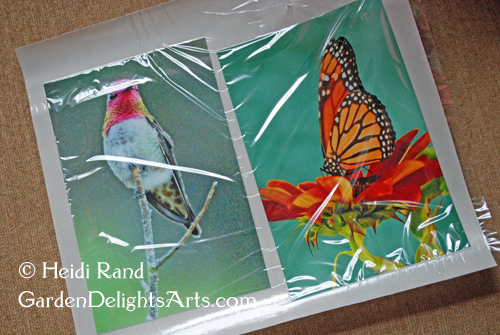
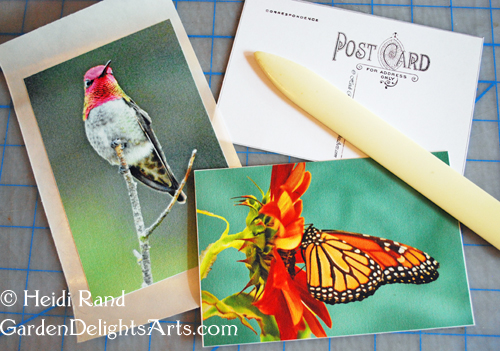
These mini-quilt postcards are so much fun to make – but I recently came up with a much quicker no-sew version. I use the same design for the back, but instead of printing onto fabric I print it onto paper cardstock. The front is fabric – I print a few of my postcard-sized designs onto a sheet of pre-treated cotton, then cut each out and run through my Xyron machine to back them with permanent adhesive.

Fabric postcards

You don’t have to use a Xyron, you can use glue or double-sided tape, or spray with adhesive. Then I bond them to the cardstock backs, using a bone folder to make sure they’re well-adhered so the edges won’t come apart during their trip through the mail.

Fabric postcards

I just checked with my local post office, and they said the normal postcard rate would apply: that’s .34 for delivery in the US and $1.15 internationally. Since the postcard rate in the US applies to cards up to 6 by 4.25 inches if you want to make them larger just use the current first-class letter rate, which is now .49.

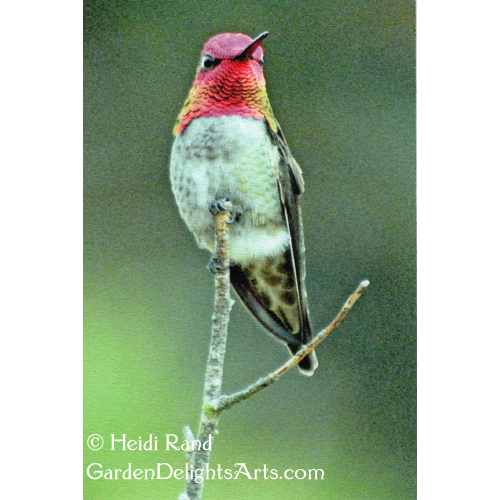
Anna's hummingbird fabric postcard

Interested in learning how to make the mini-quilt type of fabric postcards? Click here to see a free preview of my online class on CraftArtEdu, “Fabulous Fabric Postcards.”

Want to learn how to print your own fabric? Click here to find out more my ebook, Inkjet Printing on Fabric.

Inkjet Printing on Fabric Workshop

Inkjet Printing on Fabric

Workshop taught by Heidi Rand

The Village Shops, 10330 San Pablo Ave.,  El Cerrito CA

Saturday January 18, 2014 — noon to 3:00 p.m.

$40 plus supplies

Inkjet printing on fabric: One-day workshop

Welcome to the exciting world of fabric printing!  Learn to print your artwork, images and designs on fabric using your home inkjet printer. This exciting craft opens the door to endless possibilities for creating original fabric to use in quilts, art pieces, gifts, home decor, and much more.

Fabric vases

Fabric vases

I take you step-by-step through the entire process, from preparing your files to print, to choosing the right fabric and getting it ready to go through the printer, to post-printing treatment, and much more.  I will discuss the importance of knowing what kinds of inks your printer uses, and give you tips to get fabric through even the most finicky printer.

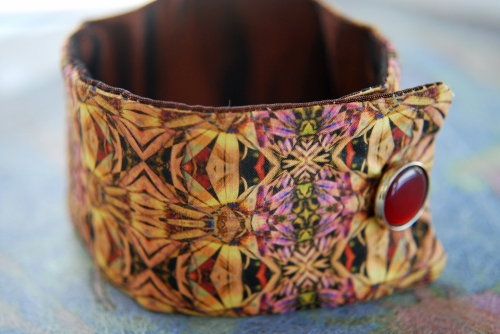
Fabric cuff bracelet

Fabric cuff bracelet

With many examples of printed fabric and fabric artwork and crafts, you’ll get new ideas about what to do with your images and designs, and the knowledge to go home and start printing your own!

If you can’t make the workshop, I also have an ebook to teach you to print on fabric.

Pre-registration is required. If you have any questions or you’re interested in registering, please email me

My other scheduled workshops:

INTRODUCTION TO SELLING YOUR ARTWORK ONLINE : February 8, 2014, Noon to 3:00 pm, $60

Overview class designed to teach you about the many different options to market and sell your artwork and/or crafts on the internet.  You will learn the pros and cons of having your own website, selling through print-on-demand websites, selling your handmade work on Etsy or similar sites, using blogs and other social marketing tools, and much more.  This information will save you much time in doing the research on your own, and save you from wasting time and money on the wrong kind of venue for your situation. Handout included.

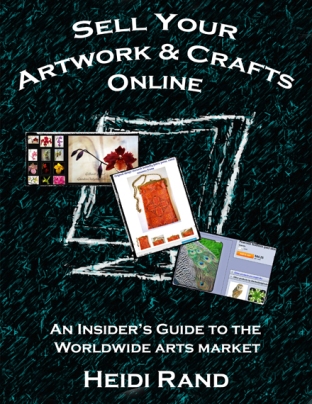
Sell Your Artwork & Crafts Online book

EXPLORING LUTRADUR : ONE-DAY WORKSHOP : April 5, 2014, Noon to 3 p.m., $40 plus materials

Learn how to create personal art with this exciting new product that combines the best qualities of fabric and paper.  Lutradur looks, feels and folds like translucent paper and doesn’t tear or fray. It’s the perfect medium for a wide variety of mixed media art, crafting, and sewing.  Each person will complete at least one project at the workshop.  Handout included.

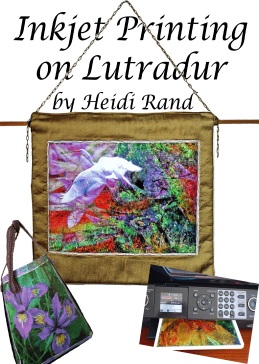
Inkjet Printing on Lutradur Ebook

INKJET HEAT TRANSFER TECHNIQUES : May 24, 2014, Noon to 3:00 p.m., $40 plus materials

Learn to make creative and unique artwork, crafts and gifts using heat transfers and your inkjet printer.  We will explore several products and techniques to transfer images and text to a wide variety of surfaces.  Each person will work on two transfer projects at the workshop.  Handout included.

Click here to see a list of all of my workshops.

Learn to Print on Fabric

Inkjet Printing on Fabric

Workshop taught by Heidi Rand

Sunday February 24, 2013 – noon to 3:30 p.m.

The Village Shops and Galleries, 10330 San Pablo Ave., El Cerrito

$40 + materials

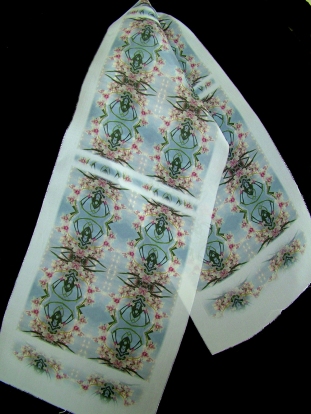
Inkjet printing: scarf

Welcome to the exciting world of fabric printing! Learn to print your artwork, images and designs on fabric using your home inkjet printer. This exciting technique opens the door to endless possibilities for creating original fabric to use in quilts, art pieces, gifts, home decor, and much more.

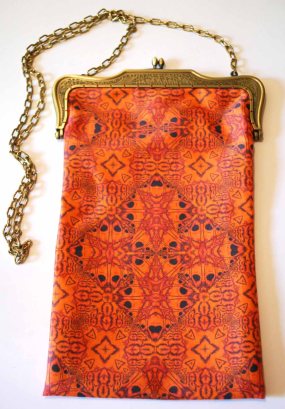
Butterfly purse

I take you step-by-step through the entire process, from preparing your files to print, to choosing the right fabric and getting it ready to go through the printer, to post-printing treatment, and much more.  I will discuss the importance of knowing what kinds of inks your printer uses, and give you tips to get fabric through even the most finicky printer.

Fabric cuff bracelet

Fabric cuff bracelet

With many examples of printed fabric and fabric artwork and crafts, you’ll get new ideas about what to do with your own images and designs, and the knowledge to go home and start printing your own! Each class member will print at least one sheet of fabric.  Pre-registration is required because I keep the workshop small so everyone gets plenty of attention.  Please email me.

Upcoming workshop:

Inkjet Heat Transfer Techniques

Saturday March 9, noon to 3:00 p.m., $40 plus materials

Have questions? Interested in registering?  Email me

If you can’t make the workshop, I also have an ebook to teach you to print on fabric and an online class at CraftArtEdu.

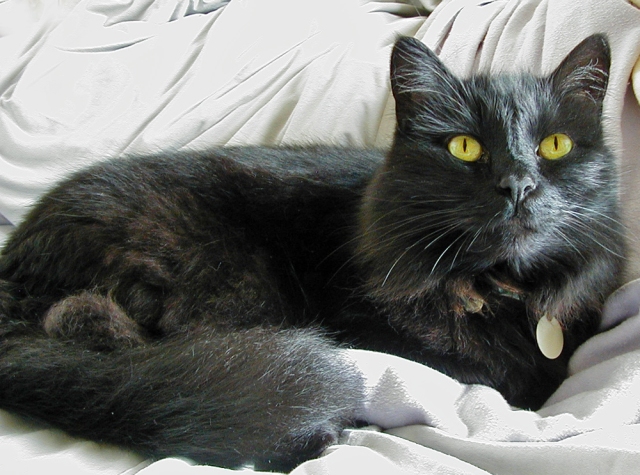
Betty-cat

We recently had to say goodbye to our wonderful Betty.  Betty was a sweet shy black cat, with the softest furry cheeks.

Betty-cat

Betty-cat

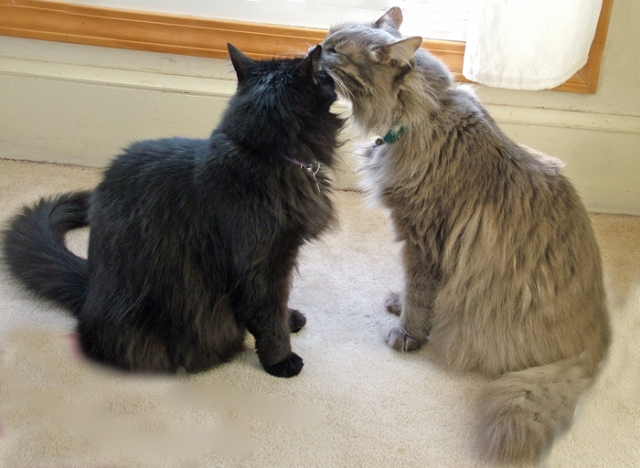
She spent a lot of time in her “cat room”, which is a large closet at the top floor of our house where she would run whenever she heard anyone in the house other than George or me.  For this reason many of our friends doubted that we actually had a third cat. She dearly loved her brother Dorian, and he frequently washed her face.

Betty and Dorian

Betty and Dorian

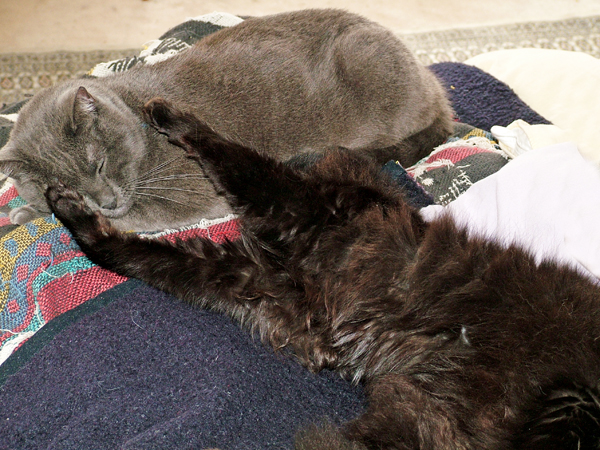
She didn’t always get along as well with her pesky little brother, Lars, but once in awhile they shared a cuddle.

Lars and Betty

Lars and Betty

A few months ago, our lovely Bee was diagnosed with intestinal lymphoma.  Dr. Benjamin Otten, of allCreatures Veterinary Clinic , referred us to veterinary oncologist Dr. Sabhlok at PETS Referral Center.  Dr. Sabhlok treated Bee with chemotherapy for several months. She rallied for about a month or so, but the lymphoma caught up with her.

In our sadness we were moved and comforted by the outpouring of sympathy from our veterinarians. We got several cards from Dr. Otten and the people who work at allCreatures, from Dr. Sabhlok and the people who work at PETS, and from VCA Albany, where we had also taken Betty.

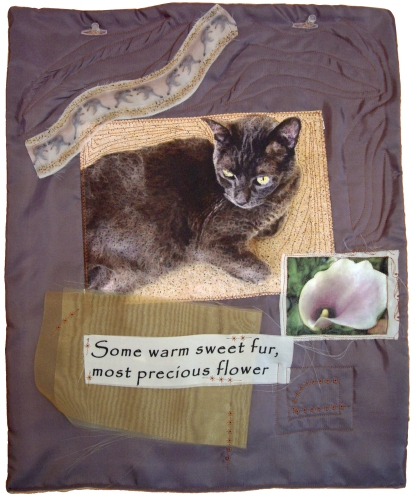
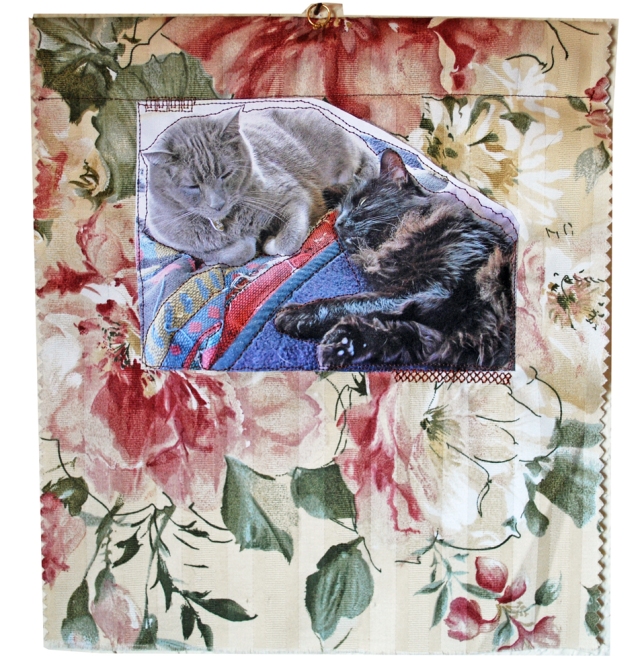
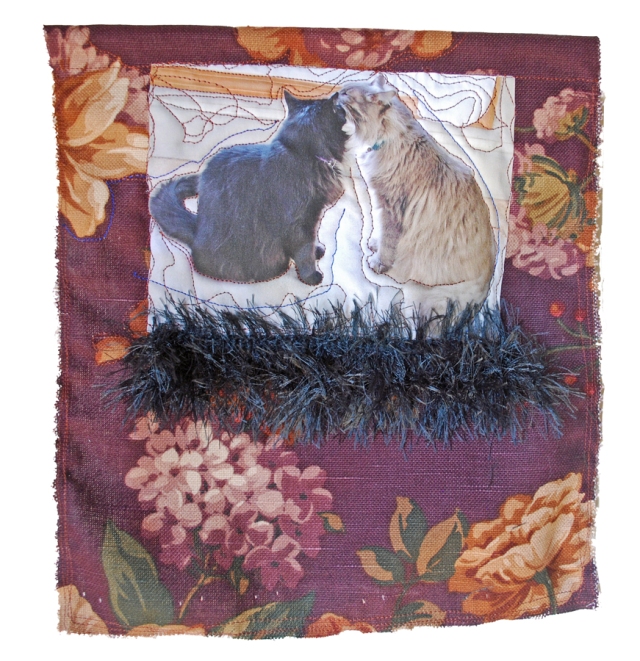
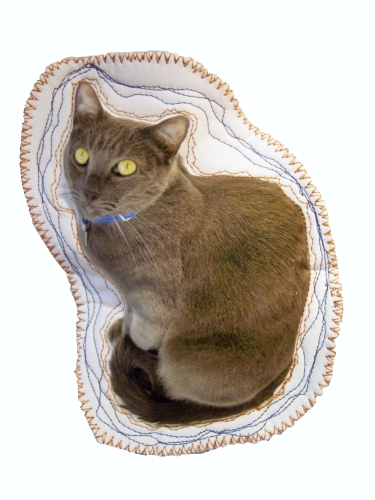
We wanted to express our appreciation for their kind gestures, and especially for their care and treatment of our precious Bee.  I decided to make mini-quilts for them, and printed my favorite photos of Betty onto fabric. Here are the two that I’ve finished so far:

Betty and Lars mini-quilt

Betty and Lars mini-quilt

Betty and Dorian mini-quilt

Betty and Dorian mini-quilt

Bye Sweet Bee, we miss you…

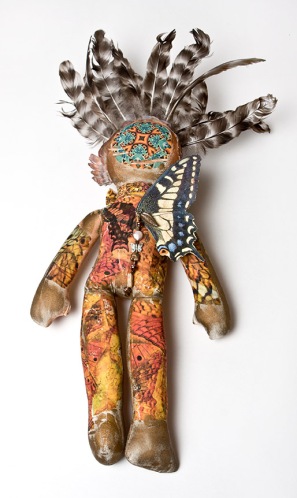
Wingspread Mixed-Media Art Doll

Wingspread Art Doll

Wingspread Art Doll

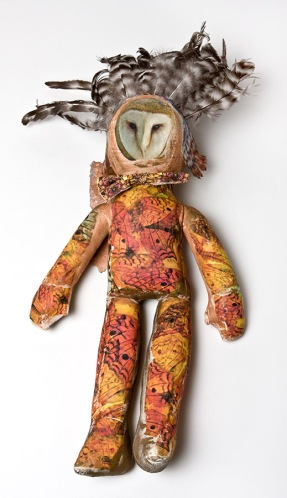
Meet “Wingspread,” a mixed-media art doll that I created, using several different techniques to transfer or attach my original photographs and designs to the soft stuffed cotton doll. Most of Wings’ body is decorated with fragments of my Golden Butterfly” photo collage. I used Transfer Artist Paper (TAP) to transfer the Golden Butterfly design to the doll.

Wingspread Art Doll - back

Wingspread Art Doll - back

Here’s Wingspread’s back.  The back of her (his?) head is a TAP transfer of my mandala design that I made from my photos of a monarch butterfly wing and a peacock feather.   This is the image:

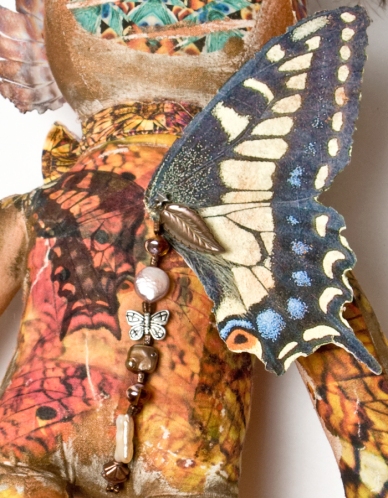
And here’s a closeup of the wings on the back:

Anise swallowtail butterfly wing on lutradur

For the large wing on the right side I printed my photo of an anise swallowtail butterfly’s spread wing on lutradur coated with Golden’s Digital Ground. I stitched the wing to the center of the back. I also added a small metal wing, and a dangle of pearl, metal and glass beads.

Wingspread’s headdress is made from beautiful black and white striped hen feathers from Barred Rock hens. They are affixed to the head through another piece of lutradur, which I printed using my photo collage of the open wing of a Barred Rock hen.

Wings wears a colorful bowtie, which I made from my original design fabric.

Wingspread is a bit over 20 inches tall, including the feather headdress.  I love art dolls, and it was so fun to make this one, incorporating my butterfly photos and designs, and using so many different techniques and products.   You can see more pictures at my Artfire gallery.  Have you ever made an art doll?  What materials did you use?

Handmade pet collars — my new online class at CraftEdu!


I just put the finishing touches on my new online class, and it’ll be available for you to preview and sign up for on Craftedu Monday March 7!  I teach you how to make dog and cat collars using re-purposed fabric from garments that you’re no longer wearing or other used material that you have around or that you find in second-hand stores.  If you know how to print on fabric (hint, hint — if not, check out my CraftEdu class on Inkjet Printing on Fabric, or my book on the same subject), you can make truly personalized and unique collars.  And of course you can always use new fabric that you buy.  These collars are great for your own pets, for gifts, to donate to shelters or animal rescue groups, or to sell.  This was my first post about the collars I was making from fabric that I designed and printed myself, and I followed that with this post specifically about the collars for dogs.

I created this class because of the steep learning curve I went through when I first started making the collars myself.  I couldn’t find good instructions anywhere, so I sat down and made this step-by-step instruction guide, with lots of close-up photos and clear directions.   I include a handout that you can print with screen-shots of the entire class.  I also give you a list of places to buy the pet collar hardware, and a guide to common collar and neck sizes for dogs and cats.

Click here to join CraftEdu’s facebook page to get the latest information on all Craftedu classes and notices about when the classes will go on sale (for some classes you can get a discount on the first day it’s offered).  It was so fun making this class — I just love the idea of using fabric that would go into landfill and turning it into a useful object instead!

Garden Delights Arts and Crafts Open Studio!

I’ve been happily scrambling to get my messy workroom presentable for my holiday Open Studio and Gift Sale.  And amazingly, it was pretty much all in place by the time the first visitor showed up!  My friend Pam always comes on my first day, and gets her pick of the calendars that I print using my images.  She took most of the calendars I had made, I’ll need to do some printing tonight.  There was a lull after she left, so I kept busy taking photographs of the spruced-up studio.

This is the view when you come in the door:

The card rack is to the right.  You can see some of my framed mandala prints hanging to the left above.  The table to the left is in the middle of the room.  This is what’s on that table:

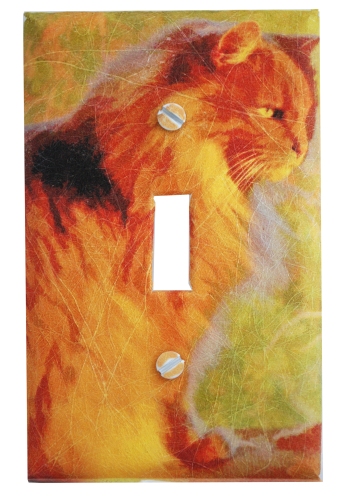
My mixed-media doll “Wings” is in the center.  Pet collars to the left (kitty collars hanging from the Lars stuffed animal).  My fabric-covered light switch plates are displayed in front of the doll.  This is a closeup of the pet collars display:

Just to your left inside the door is a shelving rack:

The top shelf has a night light, a transparency print in a frame and one of my fabric vases.  The second shelf down has a display of ornaments, including glass balls with mandalas and other designs printed on backlight film or transparencies, along with a dusting of glitter, some mandala sachet ornaments with pearl hangers, and my stuffed animal ornaments – some with squeaky toys inside!

In the photo above you can see what’s past the center table along the back wall — a hanging display with several of my purses, t-shirts, scarves, and baby onesies.  To the left, a rack with a fabric vase, my bowties, mixed-media handmade books, my Kaleidoscopes book, some coffee mugs I ordered from my Zazzle store, and a tile box.

Above is a closeup of that rack.  The piece at the bottom is an accordian of watercolor paper, with four of my abstract collages printed on lutradur and mounted.  I strung pearls across the top and bottom.  The bowties are jauntily hung just above that piece, on a jewelry bust.

The table above is to the right just past the card rack.  From left to right: purses, wooden postcards, fabric bowl, buttons, fabric vases, fabric postcards, and some night lights.  I love to use vintage pieces as displays.  On this table I’m using two old silverware boxes, sturdy wooden boxes lined with velvet.

To the back wall again, above is a display of the different kinds of boxes that I make.  First, the blue – I printed my mandala of a blue girl rose onto fabric,  quilted it and placed it into the recessed top of a wooden box.  The box to the left of that is one of my favorite tiles.  It’s a kaleidoscope design in rich deep browns, very craftsman style.  I make most of my own work, but some things I do have printed professionally.  This is one of the tiles that I have Tony at Changeyourart make to use as the tops of wooden boxes that I get at Aftosa.  The two small tiles in front of the blue girl rose box are ones that I made myself using lazertran on tumbled marble tile.  It’s a hard technique to master, and I often end up scrapping my creations, but I love how these mandalas turned out.  To the left of those tiles are some glass slide pins I made using my photos printed on velvet fine art paper or canvas, and encased in microscope slides that I outlined with copper tape.  Behind the brown tile box are two more boxes I made using lazertran.  The front one is a kaleidoscoped photo of a calla lily, and behind that is my kaleidoscope design of a fern arching.  For that box, I encased the top edges with copper metal.  To the left  is another tile box of my Lisianthus Flower design. Finally, the box at the far left is one of my favorite pieces.  I used the double exposure photograph that I took of myself and adhered it to the box using a heat transfer.  I embossed some copper and used the strips at the top and bottom edges.  I also made a dangle from pearls and glass beads, and with metal brads on mesh spelled out “treasure”.  Inside the box, I printed the same double exposure image onto silk and used batting to make it a soft pad on the inside top.

Past the boxes is more jewelry.  I have some hanging displays for earrings and bracelets.  Before I began my photo arts work, I used to make jewelry from pearls and beads, and I still love to do that.  The vintage jewelry box at the front right holds my lutradur butterfly earrings.  I take the photos of butterflies that my husband and I raise and release, and print my designs from the photos onto lutradur that I’ve coated with Digital Grounds.

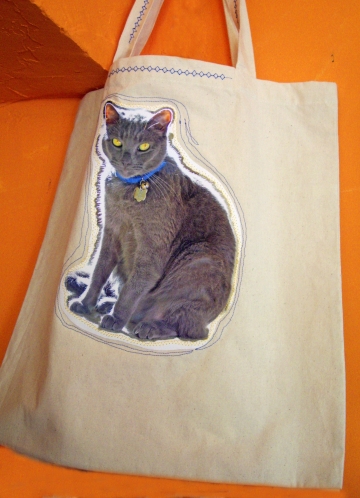
Next a view of the other side of the middle table.  At left, a pile of my tote bags, which I make by printing my images onto fabric and sewing them onto the totes.  I used to make them with iron-ons, but I much prefer the fabric.  Most of them I back with batting and then do some free-motion quilting.  To the right is another vintage jewelry box that I’ve piled with my original design fabric jewelry.  There are fabric bracelets with snaps and buttons, sachet-lets, and my sculptural braided fabric bracelets.

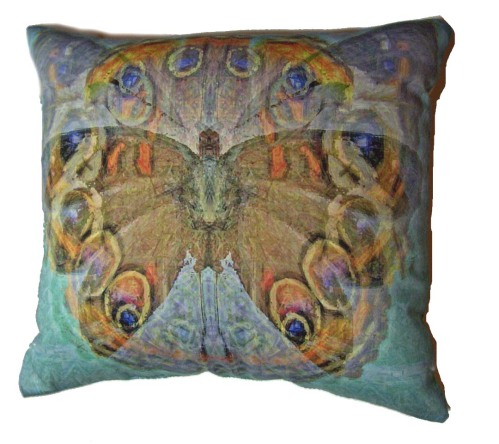
Turn around to see a plush pile of my pillows:

Next, a view of my barely disguised supply shelves.  I don’t really try to turn it into a display, I usually just put some of my work in front of the supplies:

And finally, I covered our washing machine with a delightful vintage fabric, and used it to show off a variety of things:

The soaps that my husband George makes are displayed in front and in the basket at the top left.  He makes the most wonderful soap from natural ingredients using an assortment of molds.  His most popular is the mold of a curled-up sleeping kitty, and close favorites are a butterfly and hummingbird.   He makes a variety of soaps, both cold process and melted.  To the right is a basket of sachets that I make from my fabric, which I fill with heavenly lavender flower buds (and some with rose buds).  The backs of the sachets are gauze, so you can see the flowers.  Behind the sachets is a  basket with catnip bags.  I use the strongest catnip I’ve found, Cosmic brand, and put various fun animals photos printed onto fabric on the front.  When I do Open Studio the cats are forbidden from coming down here, because they’d make a beeline for the catnip bag display and wreck the merchandise (yes, I know this from experience).

Tomorrow if I get a lull I’ll take you on a tour of the art that’s hanging on the walls … Come on by to see it yourself if you’re in the Bay Area!
Open Studio and Gift Sale 2010

Okay, I know it’s early to think about the holidays — I couldn’t believe that they already started airing Christmas ads on TV.  So think of this as just a “save the date” post.   After five steady years of holding Open Studios twice a year, I skipped last year.  But I have so many new wonderful gifts and creations to share with you, I decided to resume and I will hold my Holiday Gift Sale and Open Studio the first two weekends of December this year.   If you’re in the Bay Area, come on by for some yummy treats and good conversation — December 4-5 and 11-12, from 10 am to 5 pm.  You can email me for directions or if you have other questions.  I have a wide range of  my handmade gifts (for yourself or for friends and family), at all different prices – many under $20.  And if you follow my blog, you know I have some special new gifts for your pets!

I’d love to send you a postcard reminder – just email me your mailing address.  If you can’t make it this year, I have a lot of work to share with you in my new Artfire gallery, or check out the new ornaments and other things (t-shirts, totes, sneakers, ties, etc.) with my images on them in my Zazzle gallery.

Handmade gifts with your inkjet printer : one-day workshop November 21st


Tote bag with Lars portrait

Tote bag with Lars portrait

I look forward to this workshop all year — it gives you a chance to try any of the techniques that I teach, and sparks your imagination to go home and make gifts for everyone on your holiday list!   I’ll show you how to make personalized gifts for friends and family or for yourself, using your own photos, designs, or other material — and your home printer.

Pet squeaky toy ornament

Pet squeaky toy ornament

We’ll explore a  variety of different techniques to create unique gifts, like printing on fabric and other special surfaces ideal for making presents.  Each person will complete at least one project at the workshop, and you’ll go home with many ideas and new things to try on your own printer.  There’s plenty of time before the holidays to create gifts for everyone on your list!

Pillow

Pillow

When you make a personalized gift you can save money and show that you care to take the time to create something special for your loved ones.

Light switch plate

Light switch plate

You can use photographs and the originals or scanned memorabilia of things in your lives together for gifts that people will treasure and keep.

The workshop is Sunday November 21, 2010, noon to 3:30.  Cost is $40 plus materials. It will be held at the Canyon Trail Art Center in El Cerrito California.  Pre-registration is required.  If you have questions or want to pre-register, email me at heidirand@gmail.com.

If you want to see some of the gifts that I make from my photographs and designs, please visit my Artfire shop or my ETSY shop.