Upcycling classes!

I’m so proud to announce the rollout of my new upcycling series of classes at CraftArtEdu! To introduce the series, a free class on upcycling ephemera into postcards. And for your first foray into creative reuse I created a class teaching you how to upcycle neckties into stunning bracelets!

In honor of these brand new classes, CraftArtEdu is putting on a fantastic sale for all of my classes! Mixed media, inkjet printing, fabric art, and smartphone photography, check them all out at discounted prices through Friday April 14th — and if you see this post after that I’ll be glad to get you the same sale price, email me at heidirand [at] gmail.com.

And now … taa daaa! I’m blushing at this super promo piece from CraftArtEdu!!


Creative Reuse!

Heidi Rand loves to work in mixed media. She also loves upcycled art. In her two new classes (one is free!), she will show you how to take some materials that would normally be discarded, and put them to new use. In other words, they are upcycled into new creations!

Heidi loves photography, too. Be sure to browse through her classes on that, as well, especially if you feel a bit challenged in this area. They are full of easy-to-follow tips, tricks and techniques.

All of Heidi’s classes are at special prices through Friday, so be sure to take a peek at each one! You’ll find lots of idea boosters and creativity.

Cheers!
Donna Kato
Founder, CraftArtEdu.com

“All you need is a necktie, needle and thread, and a button!”


Upcycling Neckties into Bracelets with Heidi Rand

Learn to take a long forgotten necktie – or perhaps one that has very special meaning – and turn it into a simple, yet fashionable bracelet. These bracelets are addictive to make, and make wonderful handmade gifts for friends and family.

As noted, the materials you’ll need to make these bracelets are few: a necktie, some needle and thread and a button. That’s it! Heidi will walk you through the steps including how to:

  • Choose a necktie for your bracelet and figure out which part of the tie will work the best.
  • Measure, cut and sew your bracelet.
  • Select a closure to use – Heidi goes into lots of detail here.
  • Make your own unique buttons from leftover necktie scraps.

Now that you see how easy and fun it is to make these bracelets, put your own twist on them by adding beads, embroidery or handmade buttons!

Preview and Purchase Upcycling Neckties into Bracelets
All Levels | $13 | $10 through Friday!

Sew many ties (and closures)!


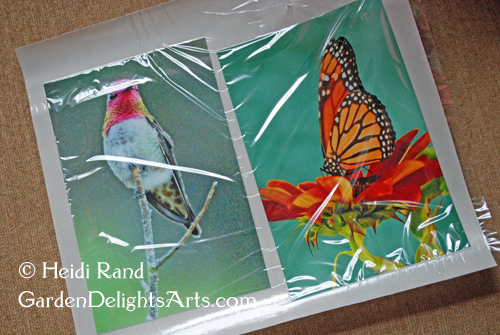
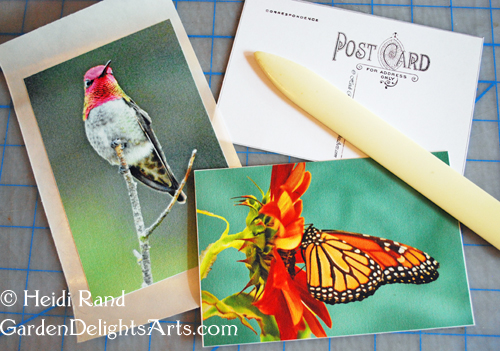
Send a little upcycled happiness!


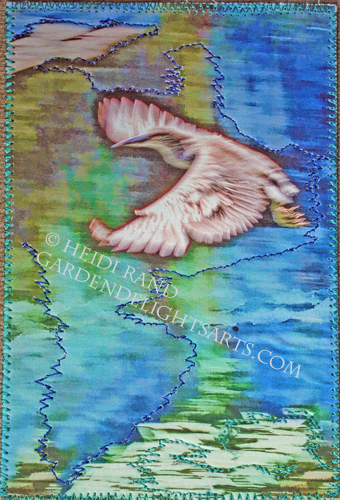
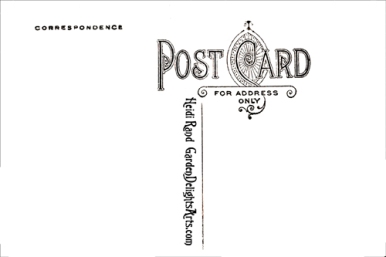
FREE CLASS: Upcycled Postcards with Heidi Rand

Create mailable art and conserve resources by upcycling old paper into miniature mixed-media masterpieces! Heidi’s instructions guide you through the steps to make postcards from books and ephemera that would be tossed or recycled. Upcycling also saves money you’d pay to buy new postcards and art supplies.

Watch Now!

Attention iPhone and Android Users!
Watch the Vimeo Version of Upcycled Postcards


Look for more upcycling classes from Heidi soon!


Taking Great Photos of Your Artwork and Crafts with Heidi Rand

Follow along with Heidi as you master the skills you need to create images that showcase the beauty and originality of your artwork in order to sell it online. Heidi takes the mystery out of so many potentially intimidating yet essential product-photography skills such as styling, lighting, and composition, and breaks them all down into easy-to-follow steps.

Heidi’s wealth of information is divided into four sections to cover everything you need to know, including how to:

  1. Choose the equipment and setup you’ll need to ensure professional images of your work, whether it’s 2- or 3-dimensional.
  2. Prepare for your photo shoot, choose the location and type of lighting you’ll need, and stage, style and use props to enhance your work.
  3. Efficiently edit your photos so they accurately show your work and fit the requirements of the sites you’ll post them to.
  4. Decide where to sell and market your work online and make use of the powerful marketing tools found on many social media sites.

This entire class is also chock-full of time-saving tips and DIY solutions to help you save money. And while Heidi provides a comprehensive list of optional equipment, all you really need to get started is a camera, artificial lighting (if you do not have a good consistent source of natural light), a tripod, and an image processing program. Heidi makes the entire process foolproof and fun!

Preview and Purchase Taking Great Photos of Your Artwork and Crafts
All Levels | $25 | Save over 30%$17 through Friday!


Taking Great Photos with Your Smartphone with Heidi Rand

If you have a smartphone with a camera, then you know how convenient it is to take hundreds (or thousands) of photos! But if you’ve been less than thrilled with the results of your smartphone photos, then this class is for you! You CAN take great photos with your camera phone, and Heidi will show you how.

There are dozens of camera phones on the market. Heidi goes over the common options and settings found in all smartphone cameras and how to set them up to take great quality photos quickly.

If you’re experienced with using a digital point-and-shoot camera, Heidi will show you how to use your skills with the different options, limitations, and advantages of smartphone cameras.

If you’re a newbie to taking photos, this is your chance to learn from the ground up – starting with the basics and moving through more complicated aspects such as:

  • Optimizing your phone settings.
  • Learning the rules of composition.
  • Having fun with special effects.
  • Editing your photos.
  • Recognizing the advantages and disadvantages of a camera phone.
  • Finding apps that help overcome the disadvantages.
  • And more!

The only equipment you need for this class is a smartphone that has a camera. Heidi also covers a range of fun tools and equipment you can use to make taking pictures easier and more fun. By learning more about your camera’s features and with Heidi’s guidance, you’ll find yet another way to express yourself creatively!

Preview and Purchase Taking Great Photos with Your Smartphone 
All Levels | $20 | Save 30%$16 through Friday!

Save 50% or MORE on these mixed-media classes from Heidi!


This offer ends midnight CT, Friday, April 7, 2017. | Not valid with other discounts.

New Necktie Upcycling Class!

Hot off the press — a new online class, Upcycling Neckties Into Bracelets, first in my series of downloadable tutorials on upcycling at CraftArtEdu.

craftartedu-dt-upcycle-necktie-bracelet-class-small

Create gorgeous bracelets from neckties! All you need to upcycle the swoon-worthy silky fabric of an unused tie into a unique bracelet is needle and thread, scissors, and a button, velcro or snap.

Upcycling Neckties Into Bracelets

My 30-plus page tutorial takes you step-by-step through the entire process, with 60 full-color closeup photos showing you exactly what to do.

Upcycling Neckties Into Bracelets

Learn how to size and sew the bracelet (no advanced skills or tools needed), plan ahead to maximize use of the rest of the tie, choose which of 4 closure options works best for your bracelet … and much more.

Upcycling Neckties Into Bracelets

With many extra tips — about the care and treatment of ties, using a sewing machine if you have one — and more. I even give you leads on where to find ties to upcycle — no stealing your husband’s faves!Upcycle Neckties Into Bracelets

Warning – you’ll quickly become addicted to making these bracelets!

Upcycling Neckties Into Bracelets
But after you run out of space on both arms to wear your favorites, start making more for friends and family, they’ll love your handmade gifts!

Click here for my CraftArtEdu main page.

Here are links to my other CraftArtEdu classes, each with its own free preview:

Taking Great Photos of Your Artwork & Crafts

Taking Great Photos With Your Smartphone

Decorating Wood With Image Transfers

Fabulous Fabric Postcards

Handmade Pet Collars

Inkjet Printing on Fabric

Inkjet Printing on Lutradur

And my free basic classes:

Inkjet Inks: What You Need to Know for Your Artwork and Crafts

Introduction to Lutradur


New Artwork Photography Class!

My newest class, Taking Great Photos of Your Artwork and Crafts, is live at CratfArtEdu!

Taking Great Photos of Your Art

I distilled my years of experience photographing and selling my work online into a four-part class packed with information about essential product photography skills, and I take you step by step through the entire process to make professional quality photos of your own creations. 
section page owl box small

All you need is a camera, tripod, lighting and image processing program, but as your budget and desire for more sophisticated tools grows, I give you a comprehensive list of equipment and resources.section page glass slide necklace small

You can master the skills needed to take great photos of your work. Learn how to prepare for your photo shoot, from choosing a location and lighting, to using props and styling to stage your work so your creativity and artistic brand shine through!

Taking Great Photos of Your Artwork & Crafts

I also show you how to efficiently edit your photos into perfect shape to post online, and finally help you figure out where to sell and market your work online!

Taking Great Photos of Your Artwork

I’d love you to check out the free preview of my class.  Regularly priced at $25 for the four-part series, it’s on sale for $19 through Sunday August 21st. Missed the sale? Email me at heidirand@gmail.com, and I’ll send you a link to get the sale price!

Click here to go to my CraftArtEdu main page.

Here’s the wonderful CraftArtEdu promo for the new class, and for my related smartphone photography class.

Speaking of which, here are links to my other CraftArtEdu classes. Each has a free preview:

Taking Great Photos With Your Smartphone

Decorating Wood With Image Transfers

Fabulous Fabric Postcards

Handmade Pet Collars

Inkjet Printing on Fabric

Inkjet Printing on Lutradur

And my free basic classes:

Inkjet Inks: What You Need to Know for Your Artwork and Crafts

Introduction to Lutradur


New Smartphone Photography Class

I’m beaming proud to announce my online class, Taking Great Photos With Your Smartphone, brand spanking new at CratfArtEdu!

Smartphone class CraftArtEdu

As a photographer who started out shooting with film cameras and doing my own darkroom processing and printing, I welcomed the ease, convenience and flexibility of digital SLR cameras and doing my own “lightroom” processing using Photoshop and an inkjet printer.

Smartphone class film

Now I’ve eagerly leaped into the world of smartphone photography and apps.

Smartphone photography class

After shooting a zillion images and analyzing scads of others’ smartphone photos, I wanted to show people how to overcome some of the limitations of the camera phone and maximize its advantages as compared to traditional cameras. While recognizing the camera phone’s strong points, it’s also important to realize when the small lens can’t measure up, so you don’t get discouraged or blame yourself for the equipment’s shortcomings. For example, you can add a telephoto lens to your phone, but attaching it and holding it steady is a lot harder than with the zoom lens on your SLR. This photo shows the camera phone telephoto lens, dwarfed by my Nikon’s zoom.

Telephoto lenses

But the small lens is directed by a large brain (computer), and many things are made much easier and less expensive with the smartphone, like editing and enhancing your photos without a software program, and quickly posting them to social media.

Smartphone photography class

Have you been disappointed with the photos you’re getting with your camera phone? Want an experienced guide to help you explore and expand your creativity with this versatile new technology that you carry around in your pocket? If so, I’d love you to check out the free preview of my class.  It’s on sale for $15 through Friday February 27th.

Click here to see my CraftArtEdu main page.

There’s a wonderful CraftArtEdu promo for the new class at this link, and it also includes descriptions of my other CraftArtEdu classes! 

Speaking of which, here are links to my other CraftArtEdu classes:

Decorating Wood With Image Transfers

Fabulous Fabric Postcards

Handmade Pet Collars

Inkjet Printing on Fabric

Inkjet Printing on Lutradur

And my free basic classes:

Inkjet Inks: What You Need to Know for Your Artwork and Crafts

Introduction to Lutradur


No Sew Fabric Postcards

I started making fabric postcards years ago because I didn’t have the sewing chops or time to make bed-sized quilts. Postcards are my way to make very small-scale art quilts with the added wonder that they’re mail-able! Click here to see my 2012 blog post about my fabric postcards. I had been collecting vintage postcards since I was a kid, and once I began to print my own photos and designs onto fabric it was a small hop to sew them into mixed-media fiber postcard form. Here’s an example, my self-portrait photo that I printed on cotton, then adorned with a bit of gauzy fabric and stitching around the design.

Fabric Postcard

Here’s another, my photo of an egret flying with random stitching around the design lines.

Egret soaring fabric postcard

For these fabric postcards I adhere the front to thick stabilizer and then add a backing. I designed this back by scanning the back of an old postcard in my collection, cleaning it up in Photoshop Elements, and adding my name and website.

Fabric postcard back

I print this back onto fabric and then sew the front/stabilizer/back together and edge the sandwich with a satin or zigzag stitch.

These mini-quilt postcards are so much fun to make – but I recently came up with a much quicker no-sew version. I use the same design for the back, but instead of printing onto fabric I print it onto paper cardstock. The front is fabric – I print a few of my postcard-sized designs onto a sheet of pre-treated cotton, then cut each out and run through my Xyron machine to back them with permanent adhesive.

Fabric postcards

You don’t have to use a Xyron, you can use glue or double-sided tape, or spray with adhesive. Then I bond them to the cardstock backs, using a bone folder to make sure they’re well-adhered so the edges won’t come apart during their trip through the mail.

Fabric postcards

I just checked with my local post office, and they said the normal postcard rate would apply: that’s .34 for delivery in the US and $1.15 internationally. Since the postcard rate in the US applies to cards up to 6 by 4.25 inches if you want to make them larger just use the current first-class letter rate, which is now .49.

Anna's hummingbird fabric postcard

Interested in learning how to make the mini-quilt type of fabric postcards? Click here to see a free preview of my online class on CraftArtEdu, “Fabulous Fabric Postcards.”

Want to learn how to print your own fabric? Click here to find out more my ebook, Inkjet Printing on Fabric.

Handmade Fabric Postcards

I love postcards! I’ve been collecting vintage postcards for many years, and when I started printing on fabric, I quickly realized that using my fabric designs and images to make postcards was just going to be way too much fun. This is one of my favorites, a self-portrait with text incorporated into the design, some stitching, and a bit of gauzy fabric.

Fabric Postcard

Here’s another, just a photo of our cat Lars that I stitched around.

Fabric Postcard: Lars Sleeping

I’m in the middle of writing and recording a new online class for CraftArtEdu, to teach you how to make your own unique fabric postcards. I just got to the part where I show different options to make the back of the card, and I thought I’d give you a preview. There are so many options to design the back of your card, but one of my favorite techniques is to scan the back of a vintage postcard. Remember if you’re going to sell the cards to use the copyright-free ones. Here’s a photo of two that I picked to use as examples in the class:

Vintage postcard backsI scanned them:

Postcard backs scannedThen I cleaned them up in Photoshop Elements.

Postcard back postcard backs scan 02b smallI’ll work on them some more, might take the color out of the bottom one, depending on how it prints on my fabric.

Have you made fabric postcards? Interested in giving it a try? Let me know! Well, back to making the class now — I’ll let you know when it’s ready. Click here for the link to the online class, check out the preview if you’re interested!

Image Transfer to Wood

I’m putting the finishing touches on my latest online class for CraftArtEdu, which is all about using heat transfers to decorate wood with your own images.

Pocketwatch owl boxUsing inkjet heat transfers (also known as t-shirt transfers) is my favorite transfer technique for wood. It’s easier than most other techniques, the results are usually more predictable, and it doesn’t require special equipment or obnoxious chemicals.

Transfer to wood veneerThere are a lot of different inkjet transfer products. I usually use Transfer Artist Paper (TAP) or the Epson iron-on  paper (using the brand manufactured for your printer gives better results than most of the generic products). You can experiment, printing the same image onto two different brands of transfers.

Reverse your file

The first rule of transferring is to reverse your file. There are some exceptions, but for most transfer processes you place the transfer face down onto your surface, so you need to flip the image.

In the class I go step by step through the process, give you lots of tips and a troubleshooting guide, and discuss many different iron-on products. I’ll let you know when it’s finished and live on CraftArtEdu.com.  Have you used heat transfers onto fabric or any other surface? Ever try it on wood? Let me know what you think! If you’re interested in seeing a preview of the class, click here.

Handmade Pet Collars class is available on CraftEdu!!

In my last post I let you know about my new online class — and hooray! it’s now available for you to preview and sign up for on Craftedu. Click here to go to my page at CraftEdu – to see the list of my classes, click on the green button: “see all classes.   Or click here to go right to the class. In the class I take you step-by-step through making adjustable dog and cat collars using re-purposed fabric from garments that you’re no longer wearing or other used material that you have around or that you find in second-hand stores.

These collars are great for your own pets, for gifts, to donate to shelters or animal rescue groups, or to sell.   They’re fun to make, but you can’t buy the hardware for them in any brick and mortar store.  Most online sources sell them in quantity for people who make the collars to sell, so I decided to make them available through my ArtFire shop in packages of two sets (if you only want one, or you can use more than two, please email me at heidirand@gmail.com) and I’ll calculate the shipping.

If you take the class and are making the collars for an animal shelter, a feral cat organization, or other animal rescue group, please email me with the name of the organization and the date when you purchased the class, and I’ll send you a set of cat or dog collar hardware at no charge.

Click here to join CraftEdu’s facebook page to get the latest information on all Craftedu classes and instructors, and notices about when new classes become available.

CraftEdu goes live!

Finally – after months of working on classes, taking photographs, writing scripts, narrating, annotating, editing, polishing …  CraftEdu goes live in beta today! I’m so honored to be part of this wonderful group of talented teachers, artists and crafters.  We’re a diverse group, with something for everyone: lots of jewelry artists of all stripes (Donna Kato, the polymer queen, is our fearless leader), but you can also find classes on digital art, fiber and textiles, encaustic, rubber stamping, mixed media, and much more!   Click here to visit CraftEdu.

I have two free classes up: Inkjet Inks, What You Need to Know for Your Arts & Crafts; and Introduction to Lutradur.   I also have two on demand classes up so far: Inkjet Printing on Fabric and Inkjet Printing on Lutradur. I’m busy working on more.  Join my group to ask questions, share ideas, or get information!

CraftEdu

Online art classes at CraftEdu — coming soon!

I’m always amazed to find that even as I reach out over the internet to people all over the world in places I’ll never be lucky enough to visit .. that it really all comes down to personal relationships.  Grace Taormina, a talented mixed media, collage and fiber artist, and author of  The Complete Guide to Rubber Stamping and The Complete Guide to Decorative Stamping is a wonderful friend I made through our local arts group, the Pinole Artisans.

Now follow me here — Grace is friends with Donna Kato, an amazing polymer clay artist, author, teacher, and product developer.  They met in the craft industry, and would catch up when they were both doing appearances on Carol Duvall’s TV shows.  When Donna began dreaming of teaching online, rather than travelling the world and spending so much time in airports, one of the first people she contacted to take part was her friend “Gracie”.  And I’m very honored that Grace recommended me to Donna.

So, what’s it all about?  Donna describes her dream, CraftEdu, as a creative powerhouse of talent covering many art and craft media.  She selected the faculty based on expertise and ability to instruct and inspire their students, and boasts of a team of the best and the brightest the art and craft world have to offer.

After much searching, Donna found the perfect platform to offer online classes.  Created and designed by Faculte, it provides a unique alternative to conventional pdf based class presentations and creates a near in person teaching environment.   CraftEdu will launch in beta in March 2010 and anticipates an official launch in April 2010.

I’ll be teaching inkjet printing on fabric, using lutradur in your art and printing on lutradur, inkjet transfer techniques, and much more! My CraftEdu gallery is a short introduction to my artwork and the kinds of classes I will be offering.

Sign up for updates for classes with CraftEdu.com

Follow the CraftEdu blog and learn more about faculty members and events at the CraftEdu facebook page!