Continuing Adventures with Kraft Tex

Last week I showed you my first project with the new art material, natural color kraft•tex, and promised to let you know how I finished the envelope purse that I decorated with my orchid image.

I’m a bit nervous about using snaps, since even using a fancy snap-attaching gizmo I’ve had some failures. I was so happy with the piece that I didn’t want to ruin it. After realizing that if my snap-attaching went astray I could cover the flub up with a button, I got out the gizmo. Happily, it worked fine!

Kraft tex envelope purse

I’m still mulling over what kind of strap or handle to add, so stay tuned for the next step in this continuing saga. For my second kraft•tex project, I wanted to make a box. The sturdiness of kraft•tex makes it ideal box-worthy material. I used an envelope and box-making scoring board, but you can easily make this box without one. For the top and bottom of a nesting box that ends up measuring 4 x 4 x 2 inches, start with two 8-inch squares. With a ruler and a bone folder or the dull side of a butter knife, score the bottom of the box first, making four scores at 2 inches in for each side of the box. The top of the box needs to be a little looser to fit over the bottom, so subtract an eighth of an inch from each of the four scores.

I designed the box using my painterly photo of a Douglas Iris that George grew for me. To decorate the top part of the box, I sized one image at 4×4 inches, and then cropped four slices of the image for the sides at 4×2 inches. I flipped the images horizontally and printed on a sheet of Transfer Artist Paper (TAP). Here you can see the box after I transferred the TAP to the top and four sides.

Iris kraft tex box

You’ll always get a more vibrant transfer to a white substrate, and I knew that the natural color kraft•tex would darken the transfer. I included another sheet of untransferred TAP printed with the same images for you to see the difference.

To assemble your box, cut slits on all four sides (in the picture above, the slits are at one side of each of the small rectangles that form each corner, which have no image transfer). Fold the corners to the inside and adhere. I used double-sided tape, but you can use glue, paste, or your favorite adhesive. I chose to leave the bottom the beautiful natural tan color of the kraft•tex.

Iris kraft tex box

You can paint on top of TAP transfers, so I added touches of gold paint to bring out the wonderful golden yellow color at the center of the iris petals. I also streaked some paint down the sides of the image and at some corners of the box. Here’s a closeup.

Iris kraft tex box closeup

I love making boxes, and always try to make one when I find new art materials. I think kraft•tex is ideal for boxes and other structural projects where its sturdiness makes it easier to work with than paper or fabric which you’d have to stiffen or back with stabilizer.

There’s still time for you to sign up for my free demonstration of TAP, Lutradur (and a bit of kraft•tex) next Saturday March 15th at Flax Art & Design in San Francisco. I’ll have the box and envelope purse there for you to see in person! Click here to read my blog post with all of the details. 

Kraft Tex Envelope Purse

Ah, isn’t a thrill to get your hands on a new art product? Playing around to figure out its best qualities, how to use it with other products and with your images and designs … doesn’t that get your creative juices flowing?

I got a roll of natural color kraft•tex, from C&T Publishing (black and white coming soon). C&T describes kraft•tex as a “tough, touchable new paper that combines the best of leather and fabric.”  You can sew, and even wash it!

I’m a bit mail-art obsessed recently, so I decided to make a clutch purse in an envelope design. Rather than print directly onto the kraft•tex I wanted to try it with Transfer Artist Paper (TAP). Transfers usually work best on white or very light backgrounds, and I thought I’d check out how well the natural tan color of the kraft•tex would take a transfer.

I spent a blissful day last weekend photographing orchids at the Pacific Orchid Exposition, and got a striking closeup of a paphiopedelum, which I altered for a painterly effect. I thought the rich colors would blend nicely with the kraft•tex. This is the image:

Paphiopedilum orchid design

I re-sized it to fit onto the front of the purse and flipped horizontally so it would transfer with the orientation I wanted – this matters most for text, of course. To fill the rest of the sheet of TAP I designed a kaleidoscope from the original image and tiled it to transfer to the inside of the purse. This is the single tile:

Paphiopedilum orchid kaleidoscope

Next, what about the back? The four flaps of the envelope overlap, so I didn’t want to use a single image. I took a portion of the original image, resized it smaller, and tiled it onto a full sheet.

Paphiopedilum orchid sheetFinally it was time to transfer! TAP works best at the highest iron setting that the surface you’re ironing onto can withstand, so I set it on linen. Taking the front piece first, I cut out closely around the image, placed it face down onto the kraft•tex, covered it with parchment paper to protect the iron, and slowly circled around the entire piece with the iron.

Paphiopedilum envelope front

I was very happy with how it turned out, so moved on to transfer the inside piece.

Paphiopedilum envelope inside

Small details and lines in an image never show up as well in a transfer as on a direct print, but I have come to accept that as the tradeoff for the ease of using a transfer rather than treating a surface for a good direct print.

Finally, for the back, I cut pieces of the TAP sheet roughly to size and transferred them one at a time to each flap.

Paphiopedilum envelope back

Drum roll please .. here’s the front of my kraft•tex Paphiopedilum Orchid Envelope Purse!

Paphiopedilum envelope purse

And the back:

Paphiopedilum envelope back

I’m plotting what kind of closure to use. Probably something involving fabric. Stay tuned!

Oh – and I’ll be demonstrating TAP and Lutradur (and, it turns out they want me to also demo kraft•tex) on Saturday March 15th at Flax Art & Design in San Francisco. Free! Click here to read my blog post with all of the details.

Have you used a new art product lately? Please show and tell!

Transfer This! Free Workshop at Flax Art

I’m beyond excited that Flax Art & Design, the fabulous art store in San Francisco, is having me put on a free workshop demonstrating my favorite products, Transfer Artist Paper (TAP) and Lutradur!

I’ve told you about both products in many blog posts (see my list below). TAP is my go-to heat transfer paper, the best I’ve ever used. TAP allows you to easily transfer crisp, colorfast and washable images to almost any surface with your household iron. You can inkjet print, paint, stamp, or draw images onto TAP for a variety of amazing effects.

Owl wooden box

Lutradur, which I’ve also written extensively about, is a spun-bonded polyester that combines the best qualities of fabric and paper. It’s a fantastic medium for mixed media as well as for artists looking to add a new level of texture to their work.

Lutradur butterfly hanging

I’m a demonstrator and teacher for C&T Publishing,makers of TAP and Lutradur. In this free 2-hour lecture/demo at Flax, I’ll show you the entire process – from creating an image on TAP to successfully transferring it to Lutradur. I’ll bring a wide variety of samples to show you the endless potential that these two products make possible, and to spark your creativity and imagination.

Lutradur and TAP butterfly window hanging

The free workshop is March 15th, from 1 to 3 pm. Space is limited, so sign up today to reserve your spot! Call Flax Art & Design at 415.552.2355, or click here to sign up online.

Want to know more?

Check out my book: Inkjet Printing on Lutradur.

CraftArtEdu class: Inkjet Printing on Lutradur.

CraftArtEdu class about using TAP and other heat transfers onto wood.

And here’s a list of my blog posts about Lutradur and TAP:

Egret in flight lutradur art quilt

Transfer artist paper on lutradur

Photos on wooden boxes

Evolon and Transfer Artist Paper

Transfer Artist Paper on cotton

Digital collage on art board

Image Transfer to Wood

More on lutradur, Digital Ground and TAP

Wingspread Mixed-Media Art Doll

Printing with Golden’s Digital Grounds on Lutradur

Butterfly Bliss mini-art hanging

Image Transfer to Wood

I’m putting the finishing touches on my latest online class for CraftArtEdu, which is all about using heat transfers to decorate wood with your own images.

Pocketwatch owl boxUsing inkjet heat transfers (also known as t-shirt transfers) is my favorite transfer technique for wood. It’s easier than most other techniques, the results are usually more predictable, and it doesn’t require special equipment or obnoxious chemicals.

Transfer to wood veneerThere are a lot of different inkjet transfer products. I usually use Transfer Artist Paper (TAP) or the Epson iron-on  paper (using the brand manufactured for your printer gives better results than most of the generic products). You can experiment, printing the same image onto two different brands of transfers.

Reverse your file

The first rule of transferring is to reverse your file. There are some exceptions, but for most transfer processes you place the transfer face down onto your surface, so you need to flip the image.

In the class I go step by step through the process, give you lots of tips and a troubleshooting guide, and discuss many different iron-on products. I’ll let you know when it’s finished and live on CraftArtEdu.com.  Have you used heat transfers onto fabric or any other surface? Ever try it on wood? Let me know what you think! If you’re interested in seeing a preview of the class, click here.

Wingspread Mixed-Media Art Doll

Wingspread Art Doll

Wingspread Art Doll

Meet “Wingspread,” a mixed-media art doll that I created, using several different techniques to transfer or attach my original photographs and designs to the soft stuffed cotton doll. Most of Wings’ body is decorated with fragments of my Golden Butterfly” photo collage. I used Transfer Artist Paper (TAP) to transfer the Golden Butterfly design to the doll.

Wingspread Art Doll - back

Wingspread Art Doll - back

Here’s Wingspread’s back.  The back of her (his?) head is a TAP transfer of my mandala design that I made from my photos of a monarch butterfly wing and a peacock feather.   This is the image:

And here’s a closeup of the wings on the back:

Anise swallowtail butterfly wing on lutradur

For the large wing on the right side I printed my photo of an anise swallowtail butterfly’s spread wing on lutradur coated with Golden’s Digital Ground. I stitched the wing to the center of the back. I also added a small metal wing, and a dangle of pearl, metal and glass beads.

Wingspread’s headdress is made from beautiful black and white striped hen feathers from Barred Rock hens. They are affixed to the head through another piece of lutradur, which I printed using my photo collage of the open wing of a Barred Rock hen.

Wings wears a colorful bowtie, which I made from my original design fabric.

Wingspread is a bit over 20 inches tall, including the feather headdress.  I love art dolls, and it was so fun to make this one, incorporating my butterfly photos and designs, and using so many different techniques and products.   You can see more pictures at my Artfire gallery.  Have you ever made an art doll?  What materials did you use?

Garden Delights Arts and Crafts Open Studio!

I’ve been happily scrambling to get my messy workroom presentable for my holiday Open Studio and Gift Sale.  And amazingly, it was pretty much all in place by the time the first visitor showed up!  My friend Pam always comes on my first day, and gets her pick of the calendars that I print using my images.  She took most of the calendars I had made, I’ll need to do some printing tonight.  There was a lull after she left, so I kept busy taking photographs of the spruced-up studio.

This is the view when you come in the door:

The card rack is to the right.  You can see some of my framed mandala prints hanging to the left above.  The table to the left is in the middle of the room.  This is what’s on that table:

My mixed-media doll “Wings” is in the center.  Pet collars to the left (kitty collars hanging from the Lars stuffed animal).  My fabric-covered light switch plates are displayed in front of the doll.  This is a closeup of the pet collars display:

Just to your left inside the door is a shelving rack:

The top shelf has a night light, a transparency print in a frame and one of my fabric vases.  The second shelf down has a display of ornaments, including glass balls with mandalas and other designs printed on backlight film or transparencies, along with a dusting of glitter, some mandala sachet ornaments with pearl hangers, and my stuffed animal ornaments – some with squeaky toys inside!

In the photo above you can see what’s past the center table along the back wall — a hanging display with several of my purses, t-shirts, scarves, and baby onesies.  To the left, a rack with a fabric vase, my bowties, mixed-media handmade books, my Kaleidoscopes book, some coffee mugs I ordered from my Zazzle store, and a tile box.

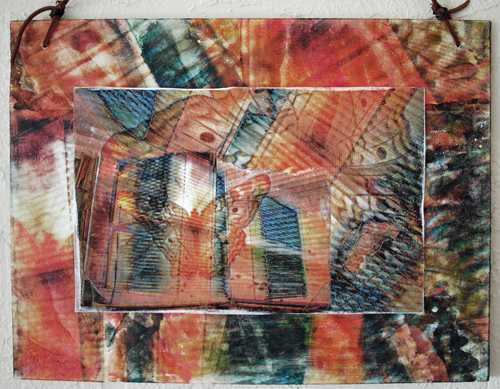
Above is a closeup of that rack.  The piece at the bottom is an accordian of watercolor paper, with four of my abstract collages printed on lutradur and mounted.  I strung pearls across the top and bottom.  The bowties are jauntily hung just above that piece, on a jewelry bust.

The table above is to the right just past the card rack.  From left to right: purses, wooden postcards, fabric bowl, buttons, fabric vases, fabric postcards, and some night lights.  I love to use vintage pieces as displays.  On this table I’m using two old silverware boxes, sturdy wooden boxes lined with velvet.

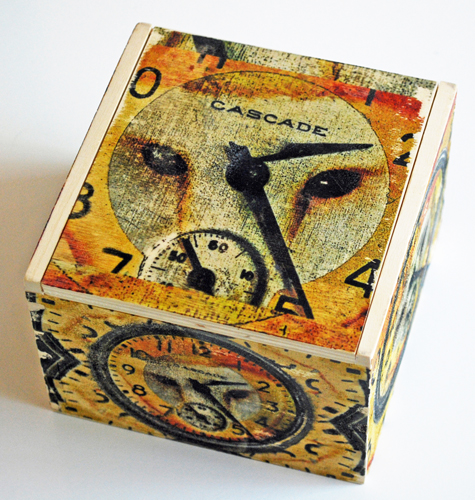
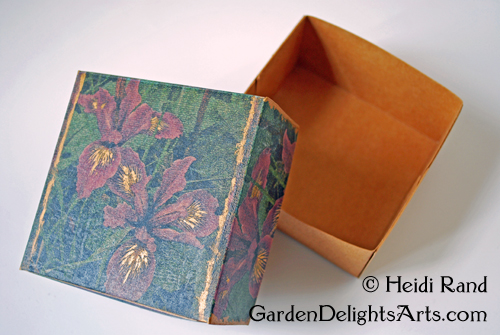
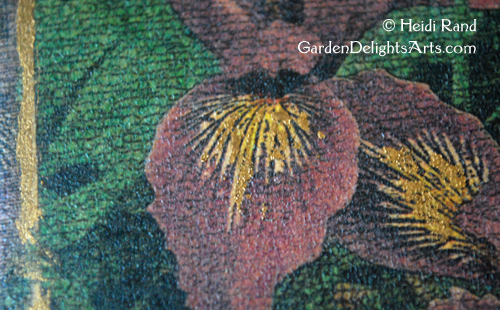
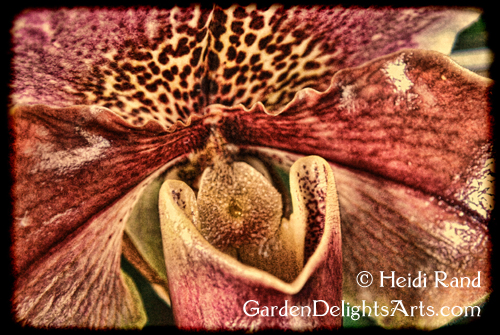
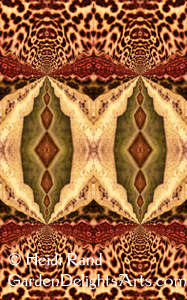
To the back wall again, above is a display of the different kinds of boxes that I make.  First, the blue – I printed my mandala of a blue girl rose onto fabric,  quilted it and placed it into the recessed top of a wooden box.  The box to the left of that is one of my favorite tiles.  It’s a kaleidoscope design in rich deep browns, very craftsman style.  I make most of my own work, but some things I do have printed professionally.  This is one of the tiles that I have Tony at Changeyourart make to use as the tops of wooden boxes that I get at Aftosa.  The two small tiles in front of the blue girl rose box are ones that I made myself using lazertran on tumbled marble tile.  It’s a hard technique to master, and I often end up scrapping my creations, but I love how these mandalas turned out.  To the left of those tiles are some glass slide pins I made using my photos printed on velvet fine art paper or canvas, and encased in microscope slides that I outlined with copper tape.  Behind the brown tile box are two more boxes I made using lazertran.  The front one is a kaleidoscoped photo of a calla lily, and behind that is my kaleidoscope design of a fern arching.  For that box, I encased the top edges with copper metal.  To the left  is another tile box of my Lisianthus Flower design. Finally, the box at the far left is one of my favorite pieces.  I used the double exposure photograph that I took of myself and adhered it to the box using a heat transfer.  I embossed some copper and used the strips at the top and bottom edges.  I also made a dangle from pearls and glass beads, and with metal brads on mesh spelled out “treasure”.  Inside the box, I printed the same double exposure image onto silk and used batting to make it a soft pad on the inside top.

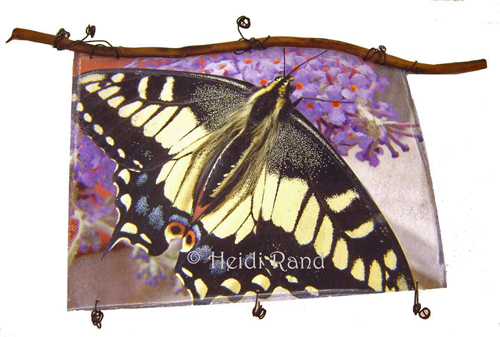
Past the boxes is more jewelry.  I have some hanging displays for earrings and bracelets.  Before I began my photo arts work, I used to make jewelry from pearls and beads, and I still love to do that.  The vintage jewelry box at the front right holds my lutradur butterfly earrings.  I take the photos of butterflies that my husband and I raise and release, and print my designs from the photos onto lutradur that I’ve coated with Digital Grounds.

Next a view of the other side of the middle table.  At left, a pile of my tote bags, which I make by printing my images onto fabric and sewing them onto the totes.  I used to make them with iron-ons, but I much prefer the fabric.  Most of them I back with batting and then do some free-motion quilting.  To the right is another vintage jewelry box that I’ve piled with my original design fabric jewelry.  There are fabric bracelets with snaps and buttons, sachet-lets, and my sculptural braided fabric bracelets.

Turn around to see a plush pile of my pillows:

Next, a view of my barely disguised supply shelves.  I don’t really try to turn it into a display, I usually just put some of my work in front of the supplies:

And finally, I covered our washing machine with a delightful vintage fabric, and used it to show off a variety of things:

The soaps that my husband George makes are displayed in front and in the basket at the top left.  He makes the most wonderful soap from natural ingredients using an assortment of molds.  His most popular is the mold of a curled-up sleeping kitty, and close favorites are a butterfly and hummingbird.   He makes a variety of soaps, both cold process and melted.  To the right is a basket of sachets that I make from my fabric, which I fill with heavenly lavender flower buds (and some with rose buds).  The backs of the sachets are gauze, so you can see the flowers.  Behind the sachets is a  basket with catnip bags.  I use the strongest catnip I’ve found, Cosmic brand, and put various fun animals photos printed onto fabric on the front.  When I do Open Studio the cats are forbidden from coming down here, because they’d make a beeline for the catnip bag display and wreck the merchandise (yes, I know this from experience).

Tomorrow if I get a lull I’ll take you on a tour of the art that’s hanging on the walls … Come on by to see it yourself if you’re in the Bay Area!
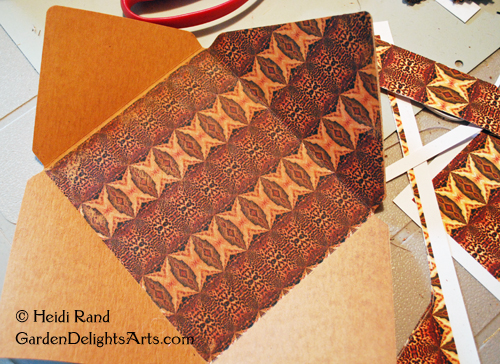
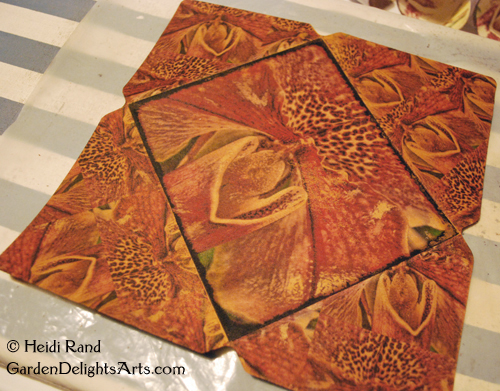
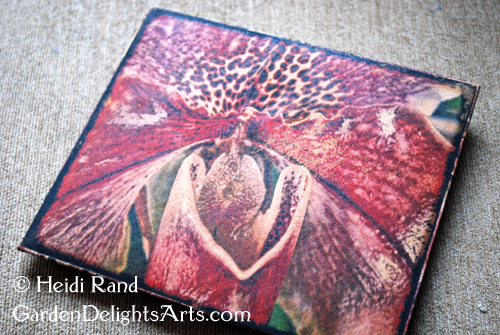
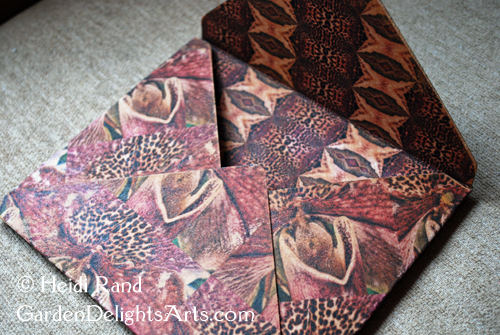
Open Studio and Gift Sale 2010

Okay, I know it’s early to think about the holidays — I couldn’t believe that they already started airing Christmas ads on TV.  So think of this as just a “save the date” post.   After five steady years of holding Open Studios twice a year, I skipped last year.  But I have so many new wonderful gifts and creations to share with you, I decided to resume and I will hold my Holiday Gift Sale and Open Studio the first two weekends of December this year.   If you’re in the Bay Area, come on by for some yummy treats and good conversation — December 4-5 and 11-12, from 10 am to 5 pm.  You can email me for directions or if you have other questions.  I have a wide range of  my handmade gifts (for yourself or for friends and family), at all different prices – many under $20.  And if you follow my blog, you know I have some special new gifts for your pets!

I’d love to send you a postcard reminder – just email me your mailing address.  If you can’t make it this year, I have a lot of work to share with you in my new Artfire gallery, or check out the new ornaments and other things (t-shirts, totes, sneakers, ties, etc.) with my images on them in my Zazzle gallery.

Garden Design Fabric Bowties!

I have gone bowtie crazy!  George has been after me for years to make him a bowtie.  Evidently they are really hard to find and good ones are quite expensive.  Then recently an old friend asked me whether I would make her some neckties from my fabric designs. I got a McCalls pattern that had both a necktie and a bowtie.  Sad to say, I quickly realized that making the necktie was going to take more time than I had .. .  But the bowtie — now that was a different story.  It was far less complicated than the necktie, and took much less fabric.  So here’s my first effort … what do you think?  The fabric is one of my favorites, a design I made by kaleidoscoping my photograph of a purple laelia orchid.

Bowtie number one

Bowtie number one

Here’s the bowtie on the proud model, George.

George wearing bowtie number 1

George wearing bowtie number 1

Bowtie number two is also from the McCalls pattern.  I used another of my favorite fabric designs, a kaleidoscope pattern from my photograph of a butterfly’s wing.

Bowtie number 2

Bowtie number 2

How do you like it on George?   For this one I used the standard bowtie hardware, a hook and clasp and adjustable slider.  I had to order the hardware online because none of the local fabric stores carry it.  Contact me if you want information about where I got the hardware.

George wearing bowtie number 2

George wearing bowtie number 2

Here’s my third bowtie.  I found great instructions on a blog for boys’ bowties, and just made it a bit larger for a man-sized bowtie.  This is a double fold tie.  I haven’t had a chance to make the strap, so I’m using one of the bowtie clip-ons that I got when I ordered the other hardware sets.

Larger bowtie

Larger bowtie

This is the back, showing the clip-on hardware.  You just slip the gizmo through the tube at the back and clip it onto each side of the shirt collar.

Back of bowtie showing clip-on

Back of bowtie showing clip-on

George was too tired to put on the shirt to model it, but I got some shots of him holding it up to his t-shirt. Here’s one:

Mr. Bowtie

Mr. Bowtie

And another … !  I figured out how to print the fabric for this design using letter-sized sheets of fabric, so I can whip up the bowties rather than waiting for yardage to be printed for me.

Honeybee design bowtie

Honeybee design bowtie

This is a closeup of the center loop

Honeybee design bowtie center piece

Honeybee design bowtie center loop

This is the original file I used – my photograph of honeybees in a hive, kaleidoscoped into this design:

Honeybee kaleidoscope design

Honeybee kaleidoscope design

Tired of bowties yet?  Okay, just one more.  My latest is made of fabric I designed from my photograph of a swallowtail butterfly wing.  I kaleidoscoped a small part of the photograph using the Kaleider software program (see my other blog posts about Kaleider).  I love how brightly colored the fabric turned out —

Swallowtail bright bowtie

Swallowtail bright bowtie

I just started showing the bowties in my Etsy store.  Click here for my first listing. I can also make them to order from any of my fabric designs, so contact me if you want to special order one.

Inkjet Transfer Techniques Workshop

One-day workshop :  Saturday July 17, 2010

Noon to 4:00 pm at Canyon Trail Park & Art Center, 6757 Gatto Ave., El Cerrito.  $45 plus materials

Butterfly window hanging

Butterfly window hanging, Transfer Artist Paper

We will explore using inkjet transfers to enhance your artwork and to create mixed media, collage and other works.  Learn several techniques to transfer images and text to a variety of surfaces.  Transfers are ideal to get your images and designs onto surfaces that you can’t fit through your printer.  We will experiment with many different products, including a new heat transfer polymer material, Transfer Artist Paper.  You will complete at least two transfers at the workshop.

Double exposure on canvas

Double exposure on canvas, heat transfer

Pre-registration required.  For more information, or to pre-register, email me at heidirand@gmail.com.  If you can’t make the workshop, email me for other options, including private classes.

Lisianthus box lazertran heat transfer

Lisianthus box lazertran heat transfer

Printing on wood veneer

I’ve written before about transferring my inkjet images and designs to wood.  I’ve done some printing directly onto wood that I treated with Golden Paint’s Digital Grounds, but not much because I haven’t had great success finding veneer that’s flat enough to print.  I ordered some veneer online from Rockler, great price – but it was too warped to send safely through the printer, and although I found directions to flatten veneer, I just didn’t have the interest in doing that step on top of all of the others needed to get a good inkjet print. I have been using small flat pieces of the Rockler veneer to make wooden postcards using Transfer Artist Paper (TAP), more about that another day.  Oh, okay, here’s a photo of those wooden postcards – I will write a whole post about my process to make those soon.

Wood veneer postcards using TAP

Wood veneer postcards using TAP

So anyway, I had great hopes for the first inkjet-treated veneer that I’ve found, available through Cards of Wood, called SMartGRAIN™.  I was excited that it could go through the normal feed of my small printer.  Thicker wood veneer has to go through the straight path of my larger printer.  This veneer is thin enough to curl through the normal feed.   I got the starter kit from Cards of Wood.  Their price for the kit is $25 for 6 letter-sized sheets.  After that, you buy them by the sheet, and they’re $5.25 each.  They also paid the shipping for the sample kit, which was nice. For my first test, I chose an image that I thought would look good on wood, and one that I had printed on veneer that I coated with Digital Grounds, for comparison.  This is the original file for my Koi and Wisteria blended collage.

Koi and wisteria blend

Koi and wisteria blend

The image is abstract, but there are sharp elements, and I wanted to see whether the inkjet coating was of good enough quality to reproduce the sharpness.  This is the result on the new inkjet-treated product from Cards of Wood:

Koi wisteria collage on wood veneer

Koi wisteria collage on wood veneer

This is the same image printed on veneer that I coated with the clear gloss Digital Ground.

Koi wisteria collage on wood veneer treated with Digital Ground

Koi wisteria collage on wood veneer treated with Digital Ground

I much prefer the print that I made on the veneer that I treated with Digital Ground.  The detail is much better – part of the collage is a garland of wisteria blooms, and the Cards of Wood print is blurry, with no sharp detail.  The color of the Cards of Wood print is a bit brighter, and it’s close to the original image file, so that’s good.  I’m very finicky about detail and resolution in my prints, though — it’s very  important to me, and it shows how good the quality of the inkjet coating is. I should emphasize that I’ve printed on many unusual surfaces, and I never expect that a print on things other than paper will look the same as on good inkjet paper.  I do know that the color and grain of the wood will affect the quality of the print.  That’s why I did the comparison between the Digital Ground-treated print and the one on SMartGRAIN™ wood.   I’m not convinced that the Cards of Wood product is worth the money.  I will print the rest of the four sheets and let you know my final verdict.