Garden Delights Gala – new arts & crafts!

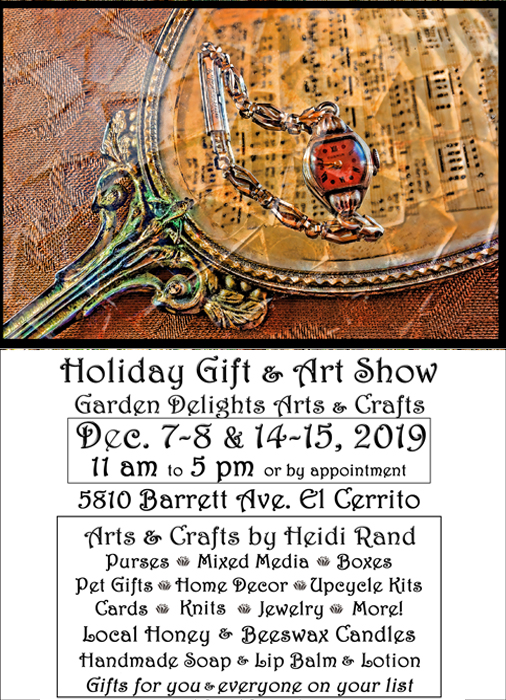
My yearly gala – Garden Delights Holiday Gift Sale & Art Show, is the first 2 weekends of December this year! The Show is at my art studio on December 7-8 and 14-15, 2019, from 11 am to 5 pm – or by appointment at your convenience.

Studio

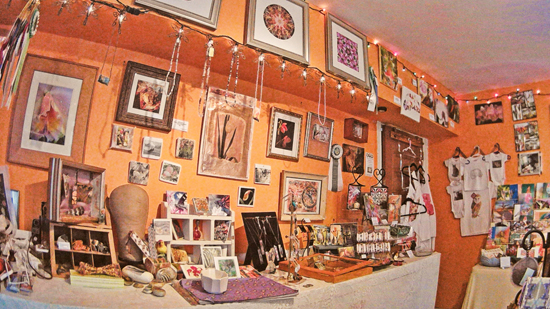
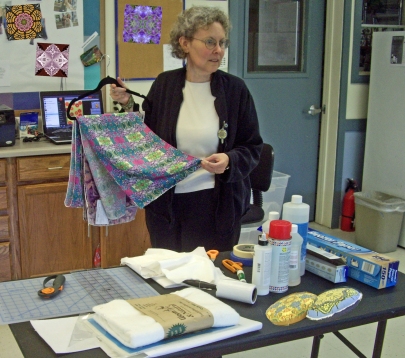
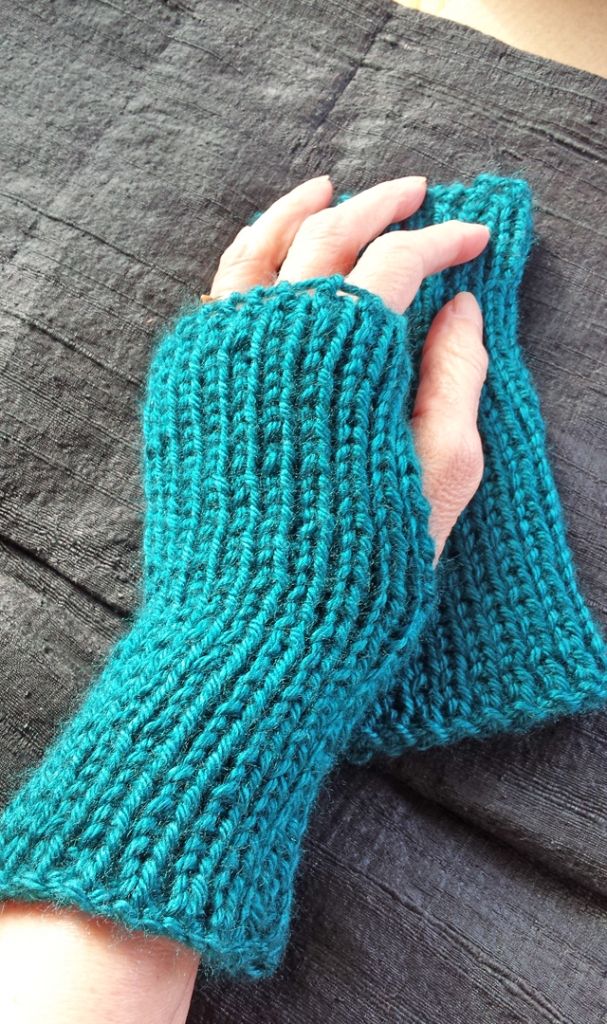
I’m proud to show my photos and mixed-media artwork & crafts, and also upcycled creations, where I bring fresh life to paper and fabric. Also hand-knits and fabulous felted creations! Fashionable fingerless mitts keep your hands cozy during mild winter weather … …

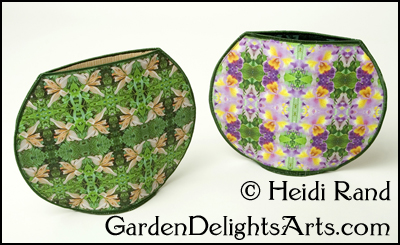
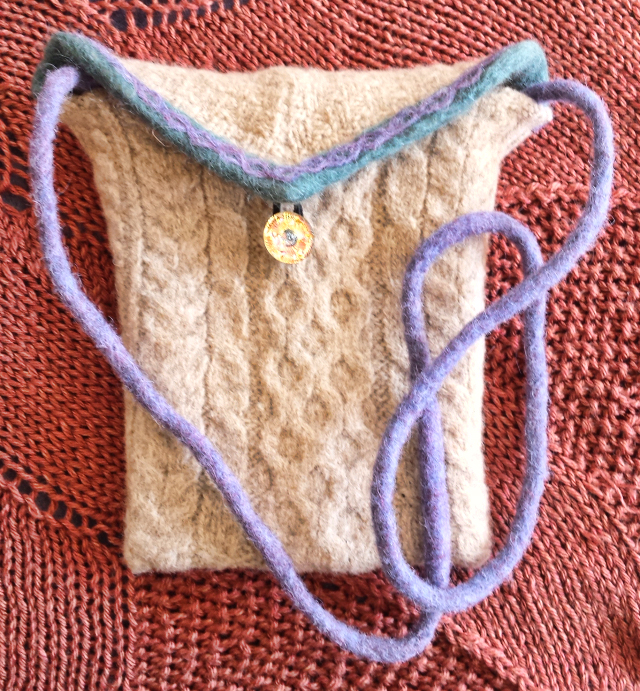
… NEW! Upcycled bags from sweaters and such …

Fancy knitted washcloths …

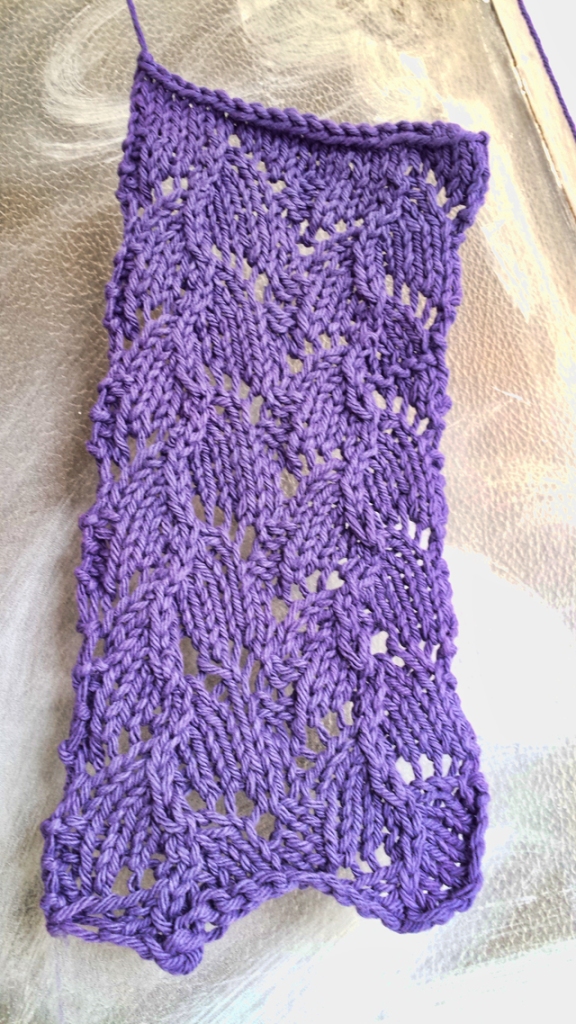
… pair with George’s soaps for a great gift …

Please stop by to relax during the holiday rush, enjoy snacks, and chat. Never any pressure to buy, but if you’ve got a list I’ve got a wide range of handmade and original-designed gifts, for yourself and for friends and family – including pets!

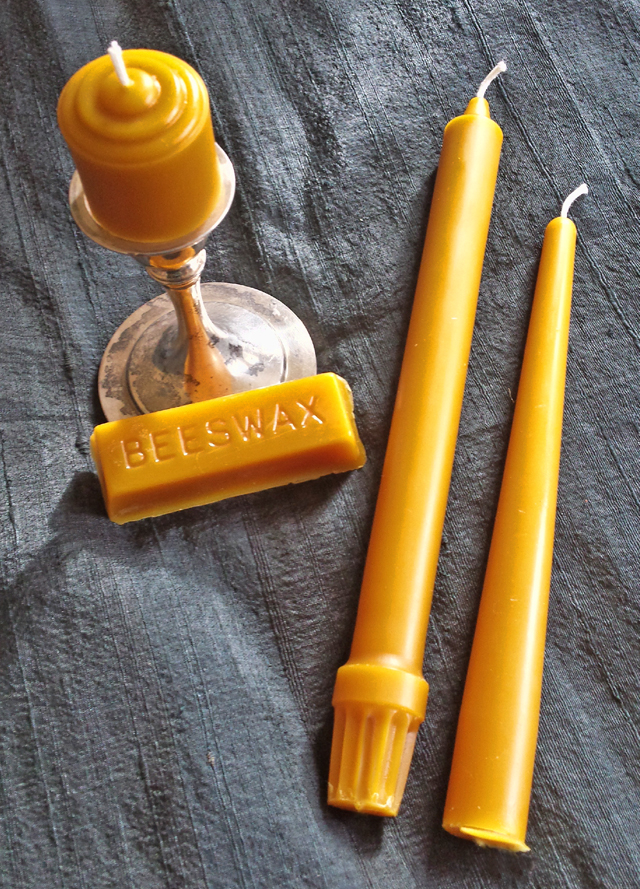
More new this year – George’s exquisite handmade 100% natural beeswax candles, including two sizes of tapers, from our honeybees’ wax. Read all about them at my article.

beeswax candles handmade by George McRae

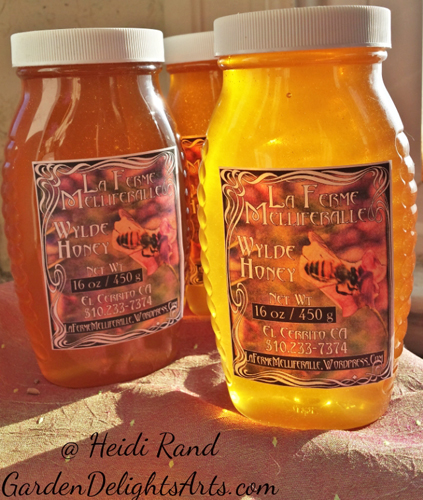
Jewelry, wearable art, purses, cards & prints, boxes, home decor, beeswax candles, and more! Our honeybees bless us with delicious honey, which many people swear helps their pollen allergies.

Local honey

Want a postcard reminder sent to your mailbox, or would you like to drop by at a time that’s more convenient for you? Email me. Can’t make the show or want to see my artwork online? Click these links:

New Necktie Upcycling Class!

Hot off the press — a new online class, Upcycling Neckties Into Bracelets, first in my series of downloadable tutorials on upcycling at CraftArtEdu.

craftartedu-dt-upcycle-necktie-bracelet-class-small

Create gorgeous bracelets from neckties! All you need to upcycle the swoon-worthy silky fabric of an unused tie into a unique bracelet is needle and thread, scissors, and a button, velcro or snap.

Upcycling Neckties Into Bracelets

My 30-plus page tutorial takes you step-by-step through the entire process, with 60 full-color closeup photos showing you exactly what to do.

Upcycling Neckties Into Bracelets

Learn how to size and sew the bracelet (no advanced skills or tools needed), plan ahead to maximize use of the rest of the tie, choose which of 4 closure options works best for your bracelet … and much more.

Upcycling Neckties Into Bracelets

With many extra tips — about the care and treatment of ties, using a sewing machine if you have one — and more. I even give you leads on where to find ties to upcycle — no stealing your husband’s faves!Upcycle Neckties Into Bracelets

Warning – you’ll quickly become addicted to making these bracelets!

Upcycling Neckties Into Bracelets
But after you run out of space on both arms to wear your favorites, start making more for friends and family, they’ll love your handmade gifts!

Click here for my CraftArtEdu main page.

Here are links to my other CraftArtEdu classes, each with its own free preview:

Taking Great Photos of Your Artwork & Crafts

Taking Great Photos With Your Smartphone

Decorating Wood With Image Transfers

Fabulous Fabric Postcards

Handmade Pet Collars

Inkjet Printing on Fabric

Inkjet Printing on Lutradur

And my free basic classes:

Inkjet Inks: What You Need to Know for Your Artwork and Crafts

Introduction to Lutradur


Inkjet Printing on Fabric

I mailed one of my new no-sew fabric postcards to a Postcrossing friend in Italy. In her profile she talked about her passion for creating handmade things including sewing and découpage, and said that she’s always looking for new techniques. 
Wood hyacinth fabric postcard

Wood hyacinth fabric postcard

When she got the postcard she asked for the link to my blog to find out more about printing on fabric. I found an old post that gave an overview but not much concrete info, and it’s high time for me to give you a full-fledged post with the basics of my favorite art process. After you read this if you’re itching to learn more, please check out my Inkjet Printing on Fabric ebook or online workshop.
Printing fabric
Printing on fabric with your inkjet printer isn’t hard, but knowing a few things before you start will save you lots of time and money. There are two main components: your printer and the kind of ink it uses, and the fabric you’re printing on.
First: inks. To get the lowdown on the difference between dye and pigment inkjet inks and why that matters in printing fabric, go on over to CraftArtEdu to watch my free basic workshop about inkjet inks. Or here’s the really quick version: dye inkjet inks are not colorfast or waterfast, so they fade over time and run when exposed to moisture. Because pigment inks are colorfast and waterfast, they are by far the best option for printing on fabric.
Fabric printing color shift dye ink

Dye ink prints: colors fade and shift

Second – you need to choose what kind of fabric to print: (1) untreated, (2) fabric that you treat yourself, or (3) pre-treated commercial fabric. There are pros and cons for each, and what you want to use the fabric for is a factor, but in this post I’ll tell you about commercially pre-treated fabrics, because they’re the most versatile and give the best results for most purposes.
Untreated vs pre-treated fabric

Untreated vs pre-treated fabric

Pre-treated fabrics are backed with paper or plastic to stiffen them so they’ll go through your printer without crumpling up and jamming your printer. You want the fabric sheet as flat as you can get it so the edges don’t catch as the printer heads go back and forth, which can make the fabric shift or leave ink on the edges.

Fabric shifted in printer

There are a lot of different ways to flatten fabric — some tips: try curling it the other way by hand, flattening the sheet under a stack of books, or ironing it.

With so many pre-treated products to choose from it’d get expensive fast to sample them all to find the ones that work best for you. I advise starting out with a few that let you buy small quantities so you can test and compare. I’ve tried most of them, and my favorites for printing with pigment inks are Cotton Satin and Cotton Lawn by EQ Printables. The fabric feels wonderful and the quality of the print is great. In my opinion the plain EQ Printables (the package says only “Inkjet Fabric Sheets”) is not worth the money, so make sure the packages are either the Cotton Satin or Cotton Lawn. I also like June Tailor’s Colorfast Sew-in Inkjet Fabric. It’s stiffer than the EQ but the print quality is great and the stiffness can be ideal for certain projects: I use it for some of my fabric postcards and a lot of my home decor creations like fabric vases and bowls, covered light switch plates, etc.

Fabric vases

Fabric vases

After printing all you have to do is remove the backing from the fabric sheet. If you’re using pigment inks there’s no need to heat set or wash; you can use it right away in your sewing or other art projects. However, even though the fabric will feel dry to the touch, it actually takes quite a while for pigment inks to thoroughly dry. If you don’t need to use the fabric right away you’ll get best results by putting it aside for a week or so.

That’s it for the basics! If you want to learn more this is the link to my blog post about my ebook “Inkjet Printing on Fabric.” My website has a page with links to all of the different options to find my ebook, including the kindle version where you can see a preview of the book.

 Or click here to go to my online workshop on CraftArtEdu, which also includes a free preview.

Lars quilt

Lars art quilt, made with different kinds of printed fabric

Book Review: How to Start Marketing Your Art, by Tamara Holland

My pal Tamara has written a sweet new ebook, How To Start Marketing Your Art: 100 DIY TipsIt’s the much-awaited sequel to her first book, How To Start Making Your Art Your Business: 100 DIY Tips.

tamara ebook cover

Tamara is a wonderfully creative person who brings her positive energy and generosity to both her life and her art. I loved the book and definitely recommend it. I posted a book review on Amazon, and wanted to share my thoughts with you as well.

If you’ve read my blog for a while, you know that Tamara is a friend of mine, and that she has been the sales rep for my greeting cards. I also profiled her in my book about selling artwork and crafts online. I pointed out in the Amazon review that although I’m not objective about Tamara-my-friend, the fact that I also write books and lead workshops about selling art means that I take very seriously my responsibility to be objective in my recommendations on this topic.

With that disclaimer, I wholeheartedly recommend Tamara’s ebook to anyone starting out in the difficult business of marketing their art. Most artists are not natural-born salespeople, but Tamara makes this subject which many artists find either foreign or even distasteful seem if not fun at least manageable. She breaks down what can feel like an overwhelming subject into do-able tasks, and offers a great variety of creative ideas for people to pick and choose what best fits their personality, abilities and situation. It’s also a great refresher for people who are already doing their own marketing but could use some new ideas and an infusion of Tamara’s infectious positive attitude.

Although it’s comprehensive and offers a wide range of marketing topics, there’s no “fat or filler” in this book. It’s focused and to the point; Tamara doesn’t waste your time with unrealistic suggestions or goals. And the generosity and cheerleading attitude that Tamara advises artists to adopt in their marketing shines through the entire book.

Tamara is refreshingly up-front about what her book is, and who it’s for. If you’re starting out and committed to doing-it-yourself art marketing, her 100 tips are invaluable. They will save you a lot of time and money re-inventing the wheel, and will point you in the right direction to do deeper research into the tips that fit for you.

Transfer This! Free Workshop at Flax Art

I’m beyond excited that Flax Art & Design, the fabulous art store in San Francisco, is having me put on a free workshop demonstrating my favorite products, Transfer Artist Paper (TAP) and Lutradur!

I’ve told you about both products in many blog posts (see my list below). TAP is my go-to heat transfer paper, the best I’ve ever used. TAP allows you to easily transfer crisp, colorfast and washable images to almost any surface with your household iron. You can inkjet print, paint, stamp, or draw images onto TAP for a variety of amazing effects.

Owl wooden box

Lutradur, which I’ve also written extensively about, is a spun-bonded polyester that combines the best qualities of fabric and paper. It’s a fantastic medium for mixed media as well as for artists looking to add a new level of texture to their work.

Lutradur butterfly hanging

I’m a demonstrator and teacher for C&T Publishing,makers of TAP and Lutradur. In this free 2-hour lecture/demo at Flax, I’ll show you the entire process – from creating an image on TAP to successfully transferring it to Lutradur. I’ll bring a wide variety of samples to show you the endless potential that these two products make possible, and to spark your creativity and imagination.

Lutradur and TAP butterfly window hanging

The free workshop is March 15th, from 1 to 3 pm. Space is limited, so sign up today to reserve your spot! Call Flax Art & Design at 415.552.2355, or click here to sign up online.

Want to know more?

Check out my book: Inkjet Printing on Lutradur.

CraftArtEdu class: Inkjet Printing on Lutradur.

CraftArtEdu class about using TAP and other heat transfers onto wood.

And here’s a list of my blog posts about Lutradur and TAP:

Egret in flight lutradur art quilt

Transfer artist paper on lutradur

Photos on wooden boxes

Evolon and Transfer Artist Paper

Transfer Artist Paper on cotton

Digital collage on art board

Image Transfer to Wood

More on lutradur, Digital Ground and TAP

Wingspread Mixed-Media Art Doll

Printing with Golden’s Digital Grounds on Lutradur

Butterfly Bliss mini-art hanging

Inkjet Printing on Fabric Workshop

Inkjet Printing on Fabric

Workshop taught by Heidi Rand

The Village Shops, 10330 San Pablo Ave.,  El Cerrito CA

Saturday January 18, 2014 — noon to 3:00 p.m.

$40 plus supplies

Inkjet printing on fabric: One-day workshop

Welcome to the exciting world of fabric printing!  Learn to print your artwork, images and designs on fabric using your home inkjet printer. This exciting craft opens the door to endless possibilities for creating original fabric to use in quilts, art pieces, gifts, home decor, and much more.

Fabric vases

Fabric vases

I take you step-by-step through the entire process, from preparing your files to print, to choosing the right fabric and getting it ready to go through the printer, to post-printing treatment, and much more.  I will discuss the importance of knowing what kinds of inks your printer uses, and give you tips to get fabric through even the most finicky printer.

Fabric cuff bracelet

Fabric cuff bracelet

With many examples of printed fabric and fabric artwork and crafts, you’ll get new ideas about what to do with your images and designs, and the knowledge to go home and start printing your own!

If you can’t make the workshop, I also have an ebook to teach you to print on fabric.

Pre-registration is required. If you have any questions or you’re interested in registering, please email me

My other scheduled workshops:

INTRODUCTION TO SELLING YOUR ARTWORK ONLINE : February 8, 2014, Noon to 3:00 pm, $60

Overview class designed to teach you about the many different options to market and sell your artwork and/or crafts on the internet.  You will learn the pros and cons of having your own website, selling through print-on-demand websites, selling your handmade work on Etsy or similar sites, using blogs and other social marketing tools, and much more.  This information will save you much time in doing the research on your own, and save you from wasting time and money on the wrong kind of venue for your situation. Handout included.

Sell Your Artwork & Crafts Online book

EXPLORING LUTRADUR : ONE-DAY WORKSHOP : April 5, 2014, Noon to 3 p.m., $40 plus materials

Learn how to create personal art with this exciting new product that combines the best qualities of fabric and paper.  Lutradur looks, feels and folds like translucent paper and doesn’t tear or fray. It’s the perfect medium for a wide variety of mixed media art, crafting, and sewing.  Each person will complete at least one project at the workshop.  Handout included.

Inkjet Printing on Lutradur Ebook

INKJET HEAT TRANSFER TECHNIQUES : May 24, 2014, Noon to 3:00 p.m., $40 plus materials

Learn to make creative and unique artwork, crafts and gifts using heat transfers and your inkjet printer.  We will explore several products and techniques to transfer images and text to a wide variety of surfaces.  Each person will work on two transfer projects at the workshop.  Handout included.

Click here to see a list of all of my workshops.

Learn to sell your art online

Are you an artist or crafter who has been thinking about finally taking the plunge to sell your artwork online? How long has starting an Etsy shop been on your “To Do” list? Are you stymied by not knowing where to start, confused by all of the options, uncertain where you fit in?

Smugmug home page

Bay Area artists, this workshop is for you! Introduction to Selling Your Artwork Online is my overview class designed to teach you the many different options to market and sell your artwork and/or crafts on the internet. Learn the pros and cons of having your own website, selling through print-on-demand websites, selling your handmade work on Etsy or similar sites, using blogs and other social marketing tools, and much more. This information will save you countless hours you’d have to spend to do the research and experimentation on your own, and save you from wasting time and money on the wrong kind of venue for your situation.

Product shot example

The workshop will be held on Sunday April 14th from noon to 3:30 at The Village Shops and Galleries, 10330 San Pablo Ave (between Stockton and Eureka), in El Cerrito. The cost is $65, which includes an extensive handout.

Facebook business page

Facebook business page

If you have a smartphone or laptop, you can bring it, but it’s not required.  We’ll cover what has been preventing you from beginning to sell online, what kinds of skills you need, how to keep yourself motivated, social media marketing, and much more.

Twitter page

Twitter page

Space is limited and pre-registration for the workshop is required.  If you have any questions or want to pre-register, just email me at heidirand[at]gmail.com
If you’re not in the Bay Area, check out my book. You’ll find links to see a preview of it at Amazon, and to order it in pdf format, kindle format, print, and more!

Profile of Poet Toni Wynn

Today, in honor of national Poem In Your Pocket Day, I take great pleasure in introducing you to poet Toni Wynn.
Color Voices Place
Color Voices Place
Poetry of California’s Central Coast.
Toni Wynn, Carla Martinez and the late John Sousa.
Sea Moon and Mille Grazie Presses.
A few months back in these pages you met Kayla Garelick, a wonderful abstract photographer and mixed media artist profiled in my new book about selling artwork and crafts online. Including a profile of Toni, who’s also a writer, arts educator and museum consultant, helped me broaden the scope of the book beyond the usual list of suspects: fine artists, photographers, craftspeople, etc. Many people don’t realize the vast opportunities to market and publish writing online, including on venues often seen as limited to the visual arts.
Toni Wynn book Ground
Toni places her poetry and other writing online in a few different ways, with more in the works as time permits. (Can you relate to that?) When the Shakespeare Press Museum (SPM), which published Toni’s book Ground, a hand-bound, letterpress, limited edition of original poetry about the earth, stopped selling the book online, she realized that she needed more control over selling her work. SPM was selling Ground on Etsy, and Toni plans to open her own Etsy shop to sell it and other limited-edition broadsides (single sheets of original poems paired with visual art).
Toni Wynn website
Toni has all the basics down. She designed her own website (above shows part of the home page), which she maintains through Squarespace. The site includes a list of her publications and a page of her poems.
Toni Wynn blog
Her blog, “Call Your Mother,” is both on Blogspot and hosted directly through her website. She writes on the blog with great heart and humor about a range of topics, including her amazingly talented and adventurous children.

Toni also hosts a blog and runs a Facebook page for an arts + STEM (science, technology, engineering and math) project called “Jam: Jazz and Visual Art in Engineering.” “Jam” is a collaboration between the Hampton University Museum and HU’s School of Science, Engineering and Technology.

Jam blog

Toni enjoys dipping into others’ work and thoughts online, and even at this early stage, likes being a part of what she poetically calls “borderless communities.” She has a profile on Goodreads, and she frequently posts comments and reviews on the site.

Are you a writer interested in sharing your work online? What sites have you found?

If you’d like to learn more about selling your work online, check out my book Sell Your Artwork & Crafts Online: An Insider’s Guide to the Worldwide Arts Market.  And please join the facebook page I started for people to network with other artists interested in selling online, where you can post questions and comments, share your progress and frustrations, and find the free tips that I post about selling online.

New book: Sell Your Artwork and Crafts Online

One New Year’s resolution down! Actually, it was a resolution I made New Year 2011, but who’s counting? I finally finished the book that I’ve been working on for, oh well – way too long. Enough buildup, here it is …

Book cover Sell Your Artwork & Crafts Online

I was teaching a workshop to help artists and crafters figure out how to sell their work online. When I decided to expand the written materials into a book, I had no idea that the 6-page handout would grow to 72 pages, with 28 photographs and screen shots to show readers what their options are and how to decide what venues are best for their work, like this shot of the front page of my Etsy shop:

The homepage of my Etsy shop

Or this illustration about how to resize the images you post online so they’re not as easy to steal:

Resized photo to post online

I also included profiles of six of my favorite artists: a photographer, painter, mixed media collage artist, printmaker, natural perfumer, and writer — who are all at very different places on the continuum of using the internet to sell and market their arts and crafts. I’ll be posting some of the profiles here, so you can meet them and draw inspiration from their art and the work they’re putting into showing and selling it online.

In conjunction with the book, I started a Facebook group where artists can network and support one another in selling their work online. You’re welcome to join it, whether you buy the book or not.

Facebook page for selling art online

And now for the tip of the day, which isn’t in the book (already working on the second edition!) Yes, you may sell the same items in your Etsy and Artfire shops. If it’s a one-of-a-kind piece it can be nerve-wracking to list in both, because if it sells from one store you need to immediately remove it from the other. But I list my ebooks in both shops. If you have duplicates of anything that you make, it’s good to get the exposure in both venues.

And a related tip: don’t use the same description in both listings. From my research, people advise that you change at least 30% of the language, because Google’s search results ranking, released in February 2011 (called Panda) penalizes duplicate postings.

I listed the ebook on Etsy yesterday, and just now put the listing up on Artfire. If you’re curious, you can check out how I changed the descriptions. I’ll check my Google Analytics to see whether I’ve been Panda slapped — that’s what they call it when your traffic goes way down because the Google algorithm is displeased with some aspect of your website.

Inkjet Fabric Printing – step by step instructional ebook

I just finished my very first ebook, on my most favorite subject: inkjet printing on fabric.  After writing an extensive booklet for the workshops I’ve been teaching, I decided to put it into ebook form so people who can’t come to my workshops could get the same information.

Inkjet fabric printing ebook

I take you through the entire process to quickly and successfully begin printing fabric on your inkjet printer. You will learn about types of inks, differences between treating fabric yourself or printing on pre-treated fabric, how to prepare fabric for printing, printing the fabric, post-printing treatments, and more.

The information and tips I’ve learned over years of printing on fabric will save you hours of time and much wasted ink and fabric. I have included many illustrations, questions and answers, and trouble-shooting tips.

Illustration: peeling off backing

Illustration: peeling off backing

There’s even a gallery of my original fabric creations to spark your imagination and creativity.

Gallery: butterfly art hanging

Gallery: butterfly art hanging

There are many books on the market about printing on fabric, but because the technology is moving so quickly, a lot of them are outdated. My guide is up to date, and I will revise it as often as needed to reflect changes in the field of inkjet fabric printing. Also, most of the books give general information that might not apply to your personal printer/ink setup. I tell you how to figure out what kind of inks your printer uses, and I can also answer by email personalized questions about your setup, or other problems you run in to when you print fabric. I also discuss the pretreated fabrics that are available commercially, and share the results of my extensive experimentation with printing using the different inks.  In the second edition of the ebook, now available, I added information about using two great products with fabric, inkAID and Golden Paints Digital Grounds (both coatings that make any surface inkjet printable.)  I’ve written a lot in this blog about Digital Grounds, and I wanted to expand the book to include these coatings – most appropriate for art fabric uses.  I also deemphasized the use of Bubble Jet Set 2000, a liquid solution that is the most common product used by people who want to treat fabric themselves for inkjet printing.  BJS contains formaldehyde, and I know a lot of people are concerned about any potential danger.  If you’re interested in the subject, the manufacturer addresses the issue in an article (read it by clicking here).

My ebook is in the format of a PDF file, which you can open and print using Adobe Reader.  I’m offering it through my etsy shop or lulu.com for $10.  Click here for the link to my ebooks section on etsy. If they are sold out and you would like one, please let me know and I will post more copies.  Or click here to see a preview and get it through my lulu shop.