Inkjet Heat Transfer workshop

Explore a creative and fun way to put your photos, artwork, and designs onto a variety of surfaces using heat transfers and an inkjet printer. At this hands-on workshop we’ll  use several different products to transfer your images onto fabric, wood, tile, and more. You’ll complete at least one transfer at the workshop, and a handout is included so you’ll be all set to make original gifts and artwork on your own.

Collage box

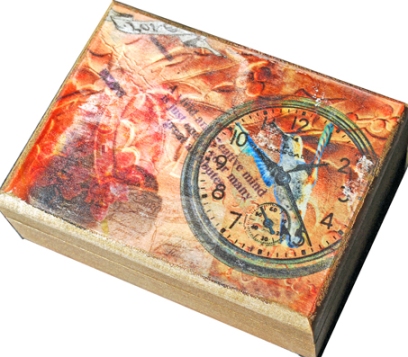
Hummingbird and Watch Collage Box: Transfer Artist Paper

The workshop will be held on Sunday April 28, from noon to 3 pm at The Village Shops and Galleries, 10330 San Pablo Ave., El Cerrito (between Stockton and Eureka). Free parking and wheelchair accessible. $40 plus a materials fee.

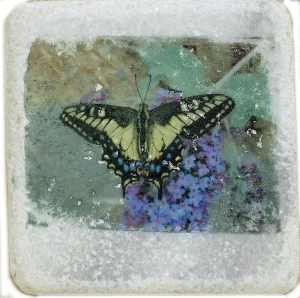
Swallowtail butterfly tile

Swallowtail butterfly tile

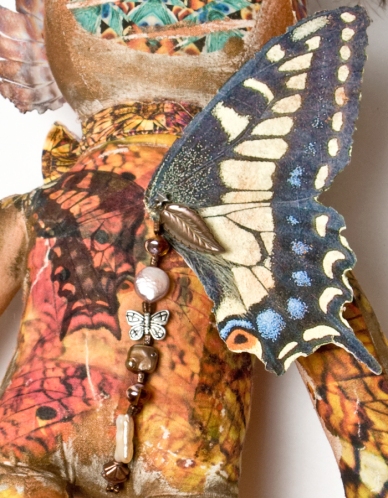
This is a versatile, clean, and inexpensive way to place your photos and images onto things that you can’t fit through your printer. I’ll show you tips and tricks to get great results from transfers, and introduce you to the best-quality products, including Transfer Artist Paper (TAP), which I used to make the collage box in the photograph at the top of this post.

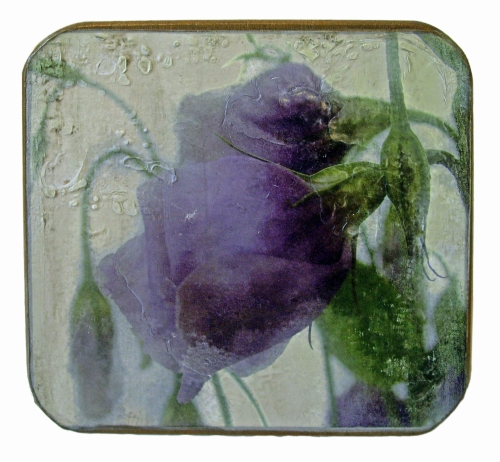
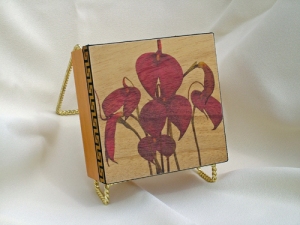
Another heat transfer product I like is made by Lazertran, a company that makes the waterslide decals I use in many of my art pieces.  The top of this box is a Lazertran heat transfer.

Lisianthus box heat transfer

Lisianthus Box: Lazaertran transfer

Want to learn more? Here are some of my blog posts about using heat transfers:

Photos on wooden boxes, part 1

Photos on metal, part 1

Photos on tiles, part 1

Photos on tiles, part 2

Pre-registration is required for the workshop because I’m limiting the size, so please email me at heidirand@gmail.com.  For the complete list of my workshops and other events, go to the workshop page on my website.

If you’re not in the Bay Area, you can learn the techniques at my online workshop at CraftArtEdu, Decorating Wood With Image Transfers.


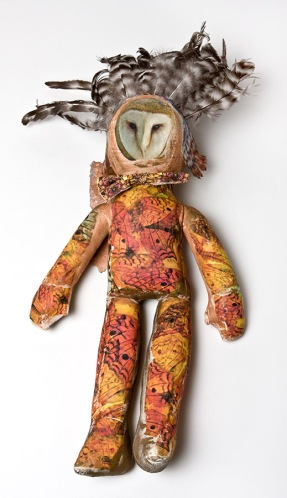
Wingspread Mixed-Media Art Doll

Wingspread Art Doll

Wingspread Art Doll

Meet “Wingspread,” a mixed-media art doll that I created, using several different techniques to transfer or attach my original photographs and designs to the soft stuffed cotton doll. Most of Wings’ body is decorated with fragments of my Golden Butterfly” photo collage. I used Transfer Artist Paper (TAP) to transfer the Golden Butterfly design to the doll.

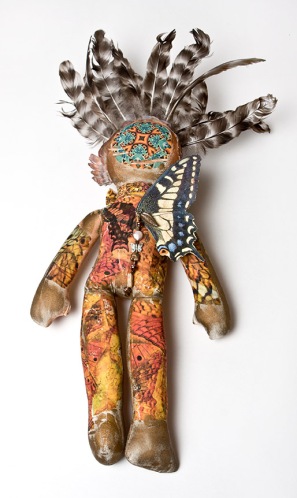
Wingspread Art Doll - back

Wingspread Art Doll - back

Here’s Wingspread’s back.  The back of her (his?) head is a TAP transfer of my mandala design that I made from my photos of a monarch butterfly wing and a peacock feather.   This is the image:

And here’s a closeup of the wings on the back:

Anise swallowtail butterfly wing on lutradur

For the large wing on the right side I printed my photo of an anise swallowtail butterfly’s spread wing on lutradur coated with Golden’s Digital Ground. I stitched the wing to the center of the back. I also added a small metal wing, and a dangle of pearl, metal and glass beads.

Wingspread’s headdress is made from beautiful black and white striped hen feathers from Barred Rock hens. They are affixed to the head through another piece of lutradur, which I printed using my photo collage of the open wing of a Barred Rock hen.

Wings wears a colorful bowtie, which I made from my original design fabric.

Wingspread is a bit over 20 inches tall, including the feather headdress.  I love art dolls, and it was so fun to make this one, incorporating my butterfly photos and designs, and using so many different techniques and products.   You can see more pictures at my Artfire gallery.  Have you ever made an art doll?  What materials did you use?

Printing on wood veneer

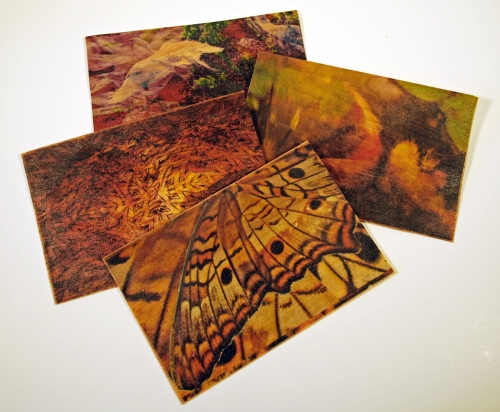
I’ve written before about transferring my inkjet images and designs to wood.  I’ve done some printing directly onto wood that I treated with Golden Paint’s Digital Grounds, but not much because I haven’t had great success finding veneer that’s flat enough to print.  I ordered some veneer online from Rockler, great price – but it was too warped to send safely through the printer, and although I found directions to flatten veneer, I just didn’t have the interest in doing that step on top of all of the others needed to get a good inkjet print. I have been using small flat pieces of the Rockler veneer to make wooden postcards using Transfer Artist Paper (TAP), more about that another day.  Oh, okay, here’s a photo of those wooden postcards – I will write a whole post about my process to make those soon.

Wood veneer postcards using TAP

Wood veneer postcards using TAP

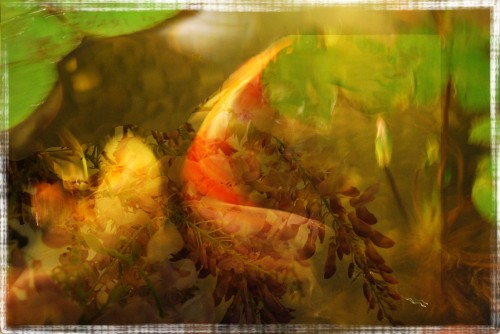
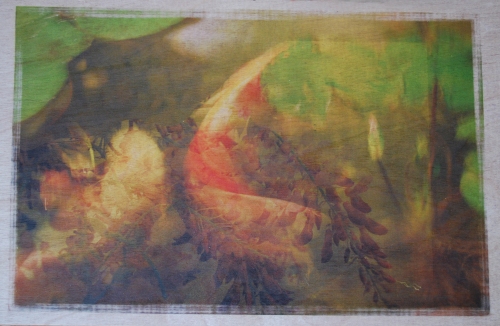
So anyway, I had great hopes for the first inkjet-treated veneer that I’ve found, available through Cards of Wood, called SMartGRAIN™.  I was excited that it could go through the normal feed of my small printer.  Thicker wood veneer has to go through the straight path of my larger printer.  This veneer is thin enough to curl through the normal feed.   I got the starter kit from Cards of Wood.  Their price for the kit is $25 for 6 letter-sized sheets.  After that, you buy them by the sheet, and they’re $5.25 each.  They also paid the shipping for the sample kit, which was nice. For my first test, I chose an image that I thought would look good on wood, and one that I had printed on veneer that I coated with Digital Grounds, for comparison.  This is the original file for my Koi and Wisteria blended collage.

Koi and wisteria blend

Koi and wisteria blend

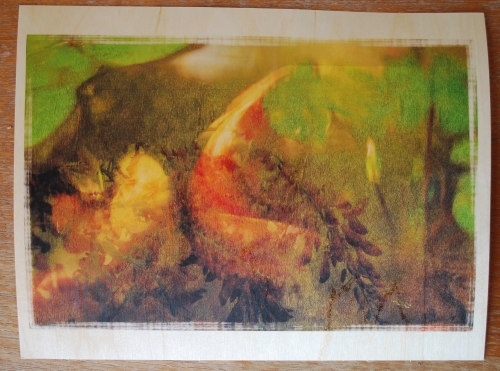
The image is abstract, but there are sharp elements, and I wanted to see whether the inkjet coating was of good enough quality to reproduce the sharpness.  This is the result on the new inkjet-treated product from Cards of Wood:

Koi wisteria collage on wood veneer

Koi wisteria collage on wood veneer

This is the same image printed on veneer that I coated with the clear gloss Digital Ground.

Koi wisteria collage on wood veneer treated with Digital Ground

Koi wisteria collage on wood veneer treated with Digital Ground

I much prefer the print that I made on the veneer that I treated with Digital Ground.  The detail is much better – part of the collage is a garland of wisteria blooms, and the Cards of Wood print is blurry, with no sharp detail.  The color of the Cards of Wood print is a bit brighter, and it’s close to the original image file, so that’s good.  I’m very finicky about detail and resolution in my prints, though — it’s very  important to me, and it shows how good the quality of the inkjet coating is. I should emphasize that I’ve printed on many unusual surfaces, and I never expect that a print on things other than paper will look the same as on good inkjet paper.  I do know that the color and grain of the wood will affect the quality of the print.  That’s why I did the comparison between the Digital Ground-treated print and the one on SMartGRAIN™ wood.   I’m not convinced that the Cards of Wood product is worth the money.  I will print the rest of the four sheets and let you know my final verdict.

CraftEdu goes live!

Finally – after months of working on classes, taking photographs, writing scripts, narrating, annotating, editing, polishing …  CraftEdu goes live in beta today! I’m so honored to be part of this wonderful group of talented teachers, artists and crafters.  We’re a diverse group, with something for everyone: lots of jewelry artists of all stripes (Donna Kato, the polymer queen, is our fearless leader), but you can also find classes on digital art, fiber and textiles, encaustic, rubber stamping, mixed media, and much more!   Click here to visit CraftEdu.

I have two free classes up: Inkjet Inks, What You Need to Know for Your Arts & Crafts; and Introduction to Lutradur.   I also have two on demand classes up so far: Inkjet Printing on Fabric and Inkjet Printing on Lutradur. I’m busy working on more.  Join my group to ask questions, share ideas, or get information!

CraftEdu

Inkjet Heat Transfer Techniques : One-day workshop

Learn to make creative and unique artwork, crafts and gifts using heat transfers and your inkjet printer. We will explore several products and techniques to transfer images and text to a wide variety of surfaces. You will complete at least two transfers at the workshop.

Masdevalia orchid box

Masdevallia orchid box

Sunday February 21, 2010, noon to 4.  Canyon Trail Park & Art Center, 6757 Gatto Ave., El Cerrito. $40 plus materials

Swallowtail butterfly tile

Swallowtail butterfly tile

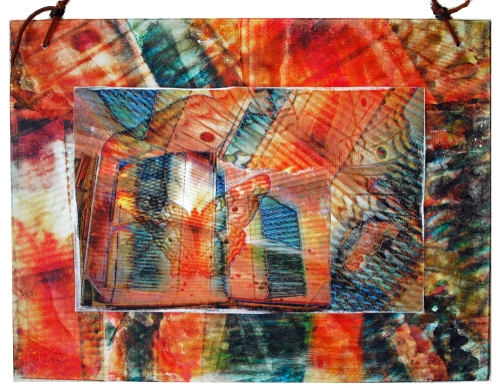
You can use heat transfers on fabric, wood, tile, metal, and many other surfaces.  It’s a versatile way to place your photographs and images onto things that you can’t fit through your printer!  For best results, I usually recommend using the  iron-on transfers that your printer manufacturer offers.  There is an exciting new product though, Transfer Artist Paper (TAP), that works very well for transfers.  You’ll have a chance to try TAP at the workshop. I made the frame for this lutradur piece with TAP transferred onto a canvas board.

Butterfly window collage lutradur and TAP

Butterfly window collage lutradur and TAP

Another heat transfer product I like is by Lazertran, the company that makes the waterslide decals that I use in many of my art pieces.  The top of this box is a lazertran heat transfer.

Lisianthus box heat transfer

Lisianthus box heat transfer

Here are some of my blog posts about using heat transfers:

Photos on wooden boxes, part 1

Photos on metal, part 1

Photos on tiles, part 1

For more information, or to pre-register, email me at heidirand@gmail.com.   For the complete list of my workshops and other events, go to the Calendar on my website.


Lavender and rust art quilt – finishing and framing

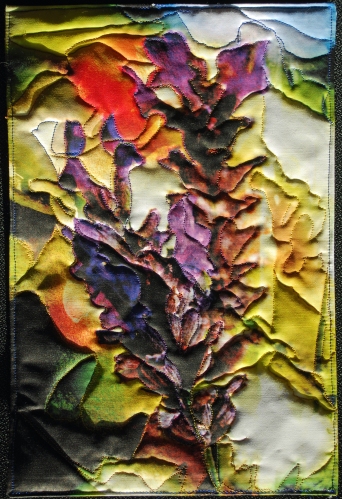
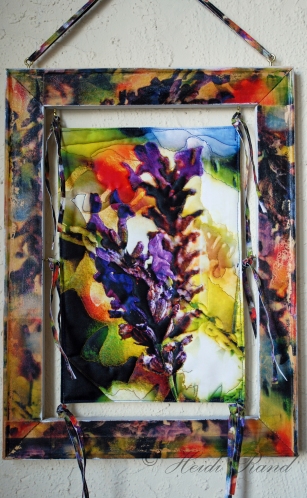
When last we met, I had printed and quilted an art quilt from a blended collage of my photographs of a lavender flower and a piece of rusted machinery.  Here’s a photo of the quilt, and this is the post about the process :

Lavender and rust art quilt

Lavender and rust art quilt

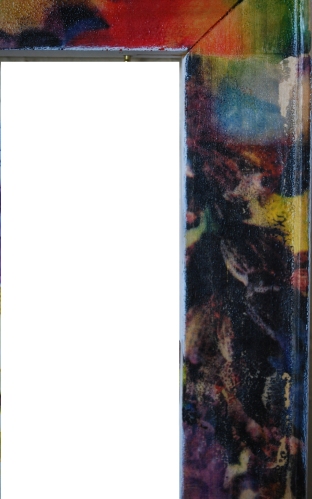
Finishing and framing a piece is always a challenge for me. Since I used new techniques and products for the quilt (more about that later!), I wanted that novelty to be reflected in the way I framed it.  Rooting around in my supply closet, I found wooden framing stretcher strips about the right size.  When assembled, the frame was a bit larger than the quilt.  To finish the plain wood in a manner that would reflect and honor the quilt, I printed some of the elements of the lavender and rust collage onto Transfer Artist Paper (see my earlier posts about TAP), and ironed them onto the front of the frame.

TAP on frame

TAP on frame

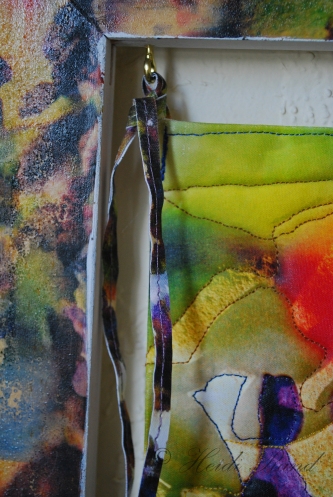
My next challenge was how to attach the quilt to the frame.  I decided to use some kind of ribbon that I would sew to the quilt and thread through screw eyes attached to the inside edge of the frame.  It’s not easy finding good screw eyes! My local fabric store didn’t have anything I liked, and I had to visit three hardware stores to find the size and color that I wanted. I put screw eyes in each of the four sides of the frame.  This is the top right edge, showing the screw eye:

Ribbon and screw eye attachment

Ribbon and screw eye attachment

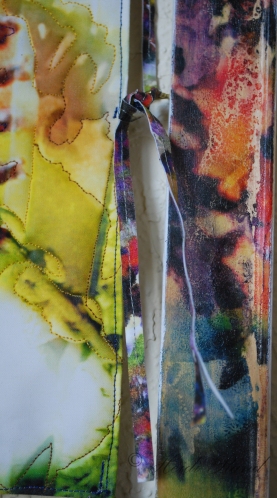
I decided that instead of using premade cord or ribbon, I would make it myself.  I started with the image that I used for the quilt and designed ribbons, but rescaled to be much smaller because the ribbon would have to fit  through the screw eyes. I printed it on the fabric that I had used for the quilt and doubled the fabric over so both sides would have a pattern.  I cut thin strips and stitched down the center of each to hold the sides together.  I threaded them through the eyes and tied knots, working with each to get the quilt centered in the frame. This is a closeup of the ribbon at the center right side of the frame:

Ribbon tied through screw eye

Ribbon tied through screw eye

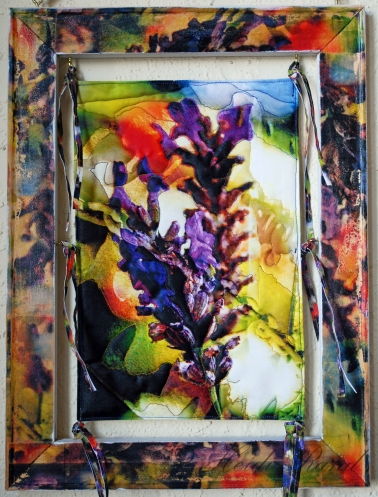
And this is the quilt tied to the frame at the six eyes:

Quilt in frame

Quilt in frame

The last challenge: how to hang the framed quilt? I didn’t want to string a wire across the back because that would show through the gaps. I couldn’t use a sawtooth because the gallery that I show my work in (a plug here for the Pinole Artisan galleries) doesn’t allow those. I decided to echo the screw eyes used on the inside, and put two at the top of the frame.  I made another long ribbon, threaded it through the eyes, doubled it over and stitched it together. The framed quilt now hangs flush against the wall from a hook or nail. This is it:

Hanging framed art quilt

Hanging framed art quilt

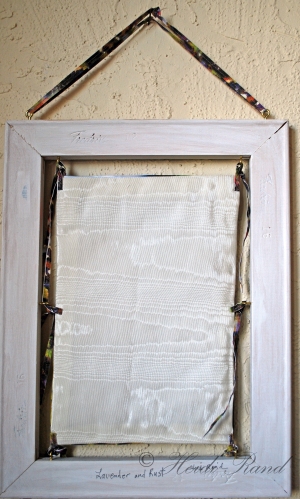
If you’re wondering about the back of the frame, it’s nothing fancy. I finished it by painting the plain wood with a few coats of white gesso.  I solved the eternal question of how to sign an art quilt (many people print labels on fabric and sew them to the back), by signing the gessoed surface with a pigment ink pen. This is how the back looks:

Back of the quilt

Back of the quilt

If you’re interested in learning how to print on fabric, check out my online class at CraftEdu.  I also offer the class with captioning for the deaf and hard of hearing.

Lavender and rust art quilt

Exploring Lutradur : One-day Workshop

Workshop taught by Heidi Rand

Canyon Trail Park & Art Center, El Cerrito
Sunday September 13th – noon to 3:30 p.m.
$35 + materials

Butterfly window collage on lutradur

Butterfly window collage on lutradur

Learn ways to create personal art with this exciting new product that combines the best qualities of fabric and paper.  Lutradur looks, feels and folds like translucent paper and doesn’t tear or fray. It’s the perfect medium for a wide variety of mixed media art, crafting, and sewing.

I will give an overview and demonstrate many ways to use lutradur: sewing, inkjet prints, transfers, heat gun, soldering iron, stamps, and more…
You will have time to explore a variety of effects to create a mixed media art project.

I will provide paints and other basic supplies.  Bring your favorite art materials to try on lutradur, as well as any photos, beads, etc. for your personal project.

Email me at HeidiRand@gmail.com or call 510.919-4652

The schedule of my upcoming workshops, all in Canyon Trail Art Center, El Cerrito CA

Sunday September 13, 2009, noon to 3:30. Exploring Lutradur

Sunday October 25, 2009, noon to 4. Inkjet transfer techniques

Sunday November 15, 2009, noon to 3:30. Handmade gifts with your inkjet printer

Saturday January 16, 2010, noon to 3:30. Handmade jewelry with your inkjet printer

Sunday February 21, 2010, noon to 4. Inkjet heat transfer techniques

Interested in any? Please email me

Transfer artist paper on lutradur

Some people on the inkjet transfer yahoo group (inkjet_transfers@yahoogroups.com) were wondering about using Transfer Artist Paper (TAP) on lutradur.  Lesley Riley’s new book on lutradur says that TAP works on lutradur (and she invented TAP, so she should know!)  Since I’m having such a great time experimenting with lutradur,  I had to try these two interesting products together. I picked one of my current favorite photo collages as my first attempt.   I took a photograph of koi swimming in a pond at the San Francisco Flower and Garden Show, and blended it with my photograph of a bonsai wisteria tree. This is the digital image:

Koi and wisteria collage

Koi and wisteria collage

I printed the image on TAP using the recommended settings (media set for plain paper, resolution at fine quality).  The TAP print looked great, pretty much what like the image looks like on treated inkjet paper. I cut an untreated piece of lutradur inches larger than the image, because if it turned out well I figured I might do something fun with the edges, like use a heat gun to curl them.

I heated my iron to the highest setting.  I put the lutradur on my ironing surface, which is relatively hard and not as padded as a normal ironing board.  I cut the excess TAP from the edges of the image, as recommended. I positioned the TAP printout face down onto the lutradur, and placed a piece of parchment paper on top of the TAP. Pressing down firmly, I held the iron in place for about 10 seconds, then moved the iron to another spot until I had covered the entire surface. I peeled up an edge and saw that it had transferred completely. I checked the other edges and had to place the TAP down and re-iron a few spots.

After making sure the entire transfer had adhered, I peeled the TAP paper off.  I think the transfer is beautiful! The color and resolution are nearly as perfect as an inkjet paper print. I love the way the translucency of the lutradur allows light to shine through the image, and how the filaments and texture complement the image. I also think the abstract nature of the image, with its rich tones, worked really well on the lutradur.

This is the result:

Koi and wisteria on lutradur

Koi and wisteria on lutradur

This is a closeup of the bottom left edge, to show the filaments and texture of the lutradur, and how well the rich color transferred:

Closeup

Closeup

And another closeup of part of the transferred image:

Closeup

Closeup

I think if you pick the image carefully, a TAP transfer to lutradur is a great option. I’m not sure how well fine details will transfer, but I think that this abstract image with its rich colors worked great.  Considering that in order to print this image directly onto the lutradur I would have to coat it with Golden’s Digital Grounds (see my other blog posts on that subject), using the TAP was certainly quicker and easier.  When I decide how to finish the piece I’ll post an update.

Printing with Golden’s Digital Grounds on Lutradur

I made a blended photo collage from my photographs of a hen’s feather and a white phalaenopsis orchid. The end design is abstract, although you can see the feather shape repeated three times in the center of the piece. I shifted the colors to get subtle golds and shades of blue.

Phalaenopsis and feather collage

Phalaenopsis and feather collage

I prepared a piece of lutradur for inkjet printing by coating it with Golden’s Digital Ground matte (see my posts about lutradur and digital ground), and printed the collage. I backed the print with thick Pellon interfacing, and sewed along some of the lines of the image.

This is the printed/quilted piece (it’s 5 by 7 inches):

Phalaenopsis and feather collage

Phal/feather collage on lutradur

This is a closeup of part of the lutradur print, to show the quilting:

Phal/feather collage printed on lutradur and quilted

Phal/feather collage printed on lutradur and quilted

I decided to finish the lutradur print by mounting it to a 9 by 12 inch canvas board.  To enlarge the phal/feather image so it would fill the blank portions of the board, I printed segments of the image on Transfer Artist Paper (see my posts about TAP).  I transferred the segments to the canvas board with my iron set on the cotton setting.

Phalaenopsis and feather collage

Phal/feather collage, TAP on canvas board

This is a closeup of one of the corners.  The TAP transfer to the cotton board resulted in a pleasing texture, and the abstract nature of the design worked well with the transfer, I think.

Phalaenopsis and feather collage

Phal/feather collage - TAP on canvas

When the weather permits, I will spray the piece with fixative (probably Golden’s new archival varnish because that was designed for use with digital grounds prints).

The end piece, with the lutradur adhered to the center of the canvas board, will look like this:

Phal/feather collage, lutradur and TAP on canvas

Phal/feather collage, lutradur and TAP on canvas

To hang, I will probably drill two small holes near the top of the piece and string with metal chain.  Alternatively, I might put the piece into a frame.    I finally decided how to hang the piece!  I  drilled two small holes near the top.  I wanted to reinforce the holes, but normal eyelets aren’t long enough to go through the canvas board and grab onto the other side.  The only grommets I could find were much too large for the effect I wanted.  I finally found some slightly longer eyelets and set them.  I debated stringing decorative chain or wire, but dug out some raw leather cord I have, and decided it worked well with the tone of the piece.  I’m very happy with it now, see what you think.

Upper corner of piece with leather cord as hanger

Upper corner of piece with leather cord as hanger

Completed piece, with leather cord as hanger

Completed piece, with leather cord as hanger

Transfer Artist Paper on cotton

I previously wrote in my post about Photos on Wooden Boxes about using Lesley Riley’s new Transfer Artist Paper (TAP), available from her at http://www.transferartist.com   I just tried TAP on fabric.  I have resisted making t-shirts to sell because I was never sure whether the iron-on transfers would last, how they would wash, etc.  I have ordered some t-shirts made with my designs through my zazzle shop, http://www.zazzle.com/GardenDelightsArts* and the shirts are great.  They have a large variety of shirt styles and sizes.  I even sold a couple of children’t t-shirts the other day at the Pinole Artisan Gallery, so hooray for that!  Anyway, I bought some blank onesies (infant garments that snap at the bottom, very cute even to those of us who are childless) and decided to either sew some of my designs onto them, or to try using iron-ons.  Since I wanted to test out the TAP transfers anyway, I decided to use them for some of the onesies. 

Printing: I reversed the images because they’re transfers and you have to place them face down on the surface, of course.  I printed them with my Epson 2400, using Ultrachrome inks.  Per Lesley’s instructions, I printed on the plain paper setting and the medium quality.  The prints looked great – just as good as they would on normal inkjet paper, with full color saturation and detail.

Lesley’s website says to either wash the fabric right away (after transferring), in which case the colors will likely fade, or to wait a couple of days, and possibly the colors will fade less.  At least that’s how I read her instructions.  She also mentions that when she waited a couple of days, there was a line through the image where the cloth folded during washing. 

I pre-washed and machine dried the onesies.  I printed 6 images on 2 sheets of the TAP paper.  Following Lesley’s instructions, I cut out the image close to the edge to avoid having excess polymer transfer to the fabric.  I set my iron to the cotton setting.  As instructed, I used my ironing board which has a thin pad.  I put a piece of parchment paper on top the TAP transfer and placed my iron on top of it.  I held it there for about 10 seconds without moving it.  Then I peeled up an edge of the paper, saw that the entire transfer had worked, and peeled the backing entirely off.

On a couple of the transfers the edges were a little rough.  I think that’s because I didn’t hold the iron in that spot long enough, and the transfer was a bit incomplete.  My fault, but nothing that will affect the finished shirt too badly.  I was surprised that the holes in the iron didn’t cause a problem. Lesley mentions that the holes MAY leave untransferred spots, and I’d assume they would — but I did pick up the iron and place it in different spots, so maybe that’s why I didn’t have a problem. 

The transfers aren’t too stiff, just a tiny bit, but Lesley says that the stiffness will decrease as the item is washed.   I decided to wait until maybe tomorrow to wash them.  I really like the saturated colors and don’t want them to fade too much.  Here’s a photo of one of them taken right after I did the transfer:

Lars, photographic transfer to cotton using TAP paper

Lars, photographic transfer to cotton using TAP paper

I was very impressed that the shades of grey throughout the photo were transferred, as were the vivid colors of Lars’ eyes and ears, and his collar.  I’ll let you know what happens after I wash and dry the onesies tomorrow.

Okay. I machine-washed and dried the onesies.  Consistent with Lesley’s results, the transfer faded a bit, and the hand is a bit less stiff.  The colors are acceptable, and I would feel confident selling items I made with the TAP paper.  I’ll continue to test them.  I’ll make a t-shirt for myself and see how it fares after normal wear and washing.  Here’s the onesie with Lars on it, after washing and drying:

Transfer with TAP, after washing
Transfer with TAP, after washing