I’ve been happily scrambling to get my messy workroom presentable for my holiday Open Studio and Gift Sale. And amazingly, it was pretty much all in place by the time the first visitor showed up! My friend Pam always comes on my first day, and gets her pick of the calendars that I print using my images. She took most of the calendars I had made, I’ll need to do some printing tonight. There was a lull after she left, so I kept busy taking photographs of the spruced-up studio.
This is the view when you come in the door:
 The card rack is to the right. You can see some of my framed mandala prints hanging to the left above. The table to the left is in the middle of the room. This is what’s on that table:
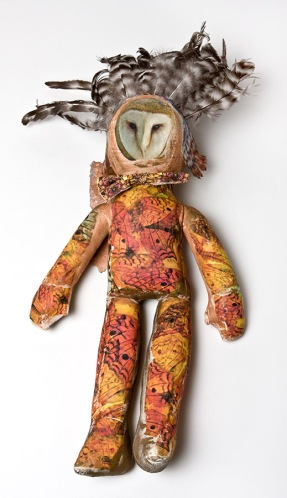
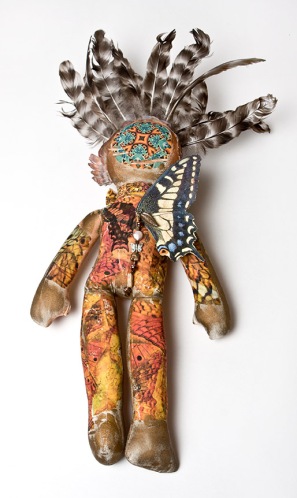
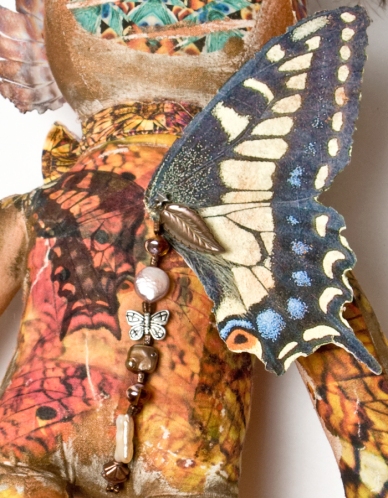
 My mixed-media doll “Wings” is in the center. Pet collars to the left (kitty collars hanging from the Lars stuffed animal). My fabric-covered light switch plates are displayed in front of the doll. This is a closeup of the pet collars display:

Just to your left inside the door is a shelving rack:
 The top shelf has a night light, a transparency print in a frame and one of my fabric vases. The second shelf down has a display of ornaments, including glass balls with mandalas and other designs printed on backlight film or transparencies, along with a dusting of glitter, some mandala sachet ornaments with pearl hangers, and my stuffed animal ornaments – some with squeaky toys inside!
 In the photo above you can see what’s past the center table along the back wall — a hanging display with several of my purses, t-shirts, scarves, and baby onesies. To the left, a rack with a fabric vase, my bowties, mixed-media handmade books, my Kaleidoscopes book, some coffee mugs I ordered from my Zazzle store, and a tile box.
 Above is a closeup of that rack. The piece at the bottom is an accordian of watercolor paper, with four of my abstract collages printed on lutradur and mounted. I strung pearls across the top and bottom. The bowties are jauntily hung just above that piece, on a jewelry bust.
 The table above is to the right just past the card rack. From left to right: purses, wooden postcards, fabric bowl, buttons, fabric vases, fabric postcards, and some night lights. I love to use vintage pieces as displays. On this table I’m using two old silverware boxes, sturdy wooden boxes lined with velvet.
 To the back wall again, above is a display of the different kinds of boxes that I make. First, the blue – I printed my mandala of a blue girl rose onto fabric, quilted it and placed it into the recessed top of a wooden box. The box to the left of that is one of my favorite tiles. It’s a kaleidoscope design in rich deep browns, very craftsman style. I make most of my own work, but some things I do have printed professionally. This is one of the tiles that I have Tony at Changeyourart make to use as the tops of wooden boxes that I get at Aftosa. The two small tiles in front of the blue girl rose box are ones that I made myself using lazertran on tumbled marble tile. It’s a hard technique to master, and I often end up scrapping my creations, but I love how these mandalas turned out. To the left of those tiles are some glass slide pins I made using my photos printed on velvet fine art paper or canvas, and encased in microscope slides that I outlined with copper tape. Behind the brown tile box are two more boxes I made using lazertran. The front one is a kaleidoscoped photo of a calla lily, and behind that is my kaleidoscope design of a fern arching. For that box, I encased the top edges with copper metal. To the left is another tile box of my Lisianthus Flower design. Finally, the box at the far left is one of my favorite pieces. I used the double exposure photograph that I took of myself and adhered it to the box using a heat transfer. I embossed some copper and used the strips at the top and bottom edges. I also made a dangle from pearls and glass beads, and with metal brads on mesh spelled out “treasure”. Inside the box, I printed the same double exposure image onto silk and used batting to make it a soft pad on the inside top.
 Past the boxes is more jewelry. I have some hanging displays for earrings and bracelets. Before I began my photo arts work, I used to make jewelry from pearls and beads, and I still love to do that. The vintage jewelry box at the front right holds my lutradur butterfly earrings. I take the photos of butterflies that my husband and I raise and release, and print my designs from the photos onto lutradur that I’ve coated with Digital Grounds.
 Next a view of the other side of the middle table. At left, a pile of my tote bags, which I make by printing my images onto fabric and sewing them onto the totes. I used to make them with iron-ons, but I much prefer the fabric. Most of them I back with batting and then do some free-motion quilting. To the right is another vintage jewelry box that I’ve piled with my original design fabric jewelry. There are fabric bracelets with snaps and buttons, sachet-lets, and my sculptural braided fabric bracelets.
Turn around to see a plush pile of my pillows:
 Next, a view of my barely disguised supply shelves. I don’t really try to turn it into a display, I usually just put some of my work in front of the supplies:
 And finally, I covered our washing machine with a delightful vintage fabric, and used it to show off a variety of things:
 The soaps that my husband George makes are displayed in front and in the basket at the top left. He makes the most wonderful soap from natural ingredients using an assortment of molds. His most popular is the mold of a curled-up sleeping kitty, and close favorites are a butterfly and hummingbird. He makes a variety of soaps, both cold process and melted. To the right is a basket of sachets that I make from my fabric, which I fill with heavenly lavender flower buds (and some with rose buds). The backs of the sachets are gauze, so you can see the flowers. Behind the sachets is a basket with catnip bags. I use the strongest catnip I’ve found, Cosmic brand, and put various fun animals photos printed onto fabric on the front. When I do Open Studio the cats are forbidden from coming down here, because they’d make a beeline for the catnip bag display and wreck the merchandise (yes, I know this from experience).
Tomorrow if I get a lull I’ll take you on a tour of the art that’s hanging on the walls … Come on by to see it yourself if you’re in the Bay Area!


