George thought spinning wool could be my knitting journey’s next step; maybe someday, but for now I’ve swerved into the wonderful world of felting! Ever toss a wool sweater into the hot wash by mistake, only to … sob … pull out a tightly compacted knit that’d fit a Barbie doll? That sweater, dear reader, was felted.
There’s lots of ways to felt wool on purpose, I’ve ventured into two of them – wet felting and needle felting – I used both techniques to create a purse. There are also different ways to get the woolen piece that you’re going to felt. You can knit & knit & knit … & knit, and then shrink your handiwork down by felting, but how much faster to upcycle a moth-eaten thrift store sweater?

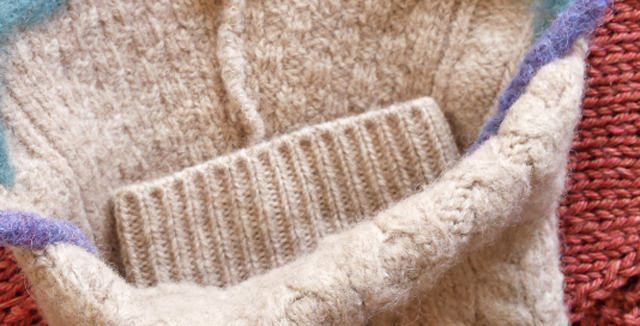
Here’s a quick trip showing what I did to the beige sweater at the bottom of the photo above, a 100% merino wool cable-knit. First, I whipped out my scissors and cut off one of the sleeves. I gathered my wet felting supplies: a tub of hot water, a bar of olive oil & lavender soap, and two nubbly rubbery oven mitts. Many people wet felt in their washing machines, but I’m nervous about stressing our problematic plumbing. Wet felting works on 3 elements to get the wool fibers to grab onto each other and interlock: hot water, soap, and agitation. The hand method uses good old-fashioned elbow grease. The silicon mitts protect my hands and speed the felting. After maybe a half hour total of stirring and rubbing, I rinsed the sleeve in cold water and decided I was done! The fabric had shrunk a bit, it was thicker and denser, and the cabled stitch definition was quite muted.

Time to turn it into a purse! I cleaned up the rough top edge, which I’ll fold over to close the purse, by needle-felting wool roving around the edge.

Next, I folded the cuff up inside from the bottom to create a pocket, sewed the back of the cuff to the inside of the bag, and then sewed the bottom closed.
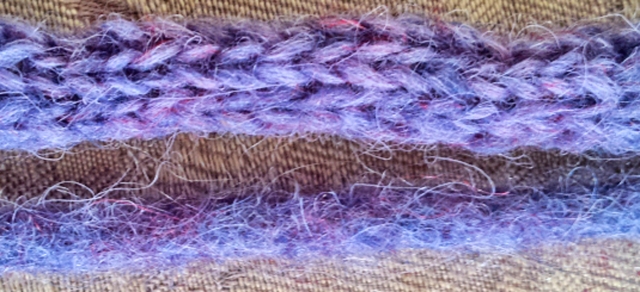
Strap time: I knitted a 5-stitch I-cord from Lopi Plötulopi unspun yarn, and wet felted it. Love Lopi yarn colors, but boy is it scratchy! After making a few more purses I realized that braiding yarn is much quicker than knitting an I-cord, felting it erases any stitch definition so unless you really like knitting a really really long boring cord, try braiding! Read more about I-cords here.
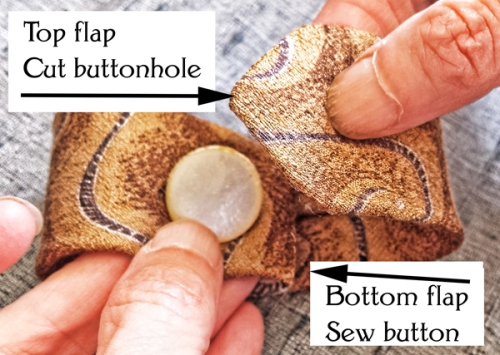
For the closure, I sewed a button to the front, and sewed a loop of elastic cord to the inside of the folded over top edge. And voila!

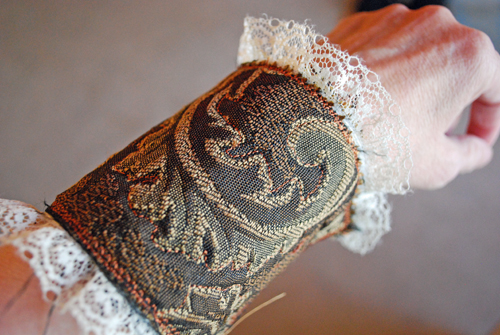
I like how the pattern of the back worked out, with the cables at an angle down to the center.

One sleeve down, I’m plotting what to make with the rest of the sweater even now!
If you’re new to felting, you can find all the information you need from many great books and online tutorials, or look for a class at your local yarn store (LYS). If I had a resource that stood out I’d let you know, but I don’t — I’ve gathered bits of wisdom from more than 20 books & ebooks. I’m far from an expert, but let me know if you have questions, and please let me know about your own adventures with felting!


 640")


 The glorious heart of the event is the hundred-foot display of roses — everyone from expert cultivators to people with a few roses blooming in their yard bring cut roses to show. They’re grouped and arranged by type, the result an intoxicating display of scents and colors.
  You can buy heirloom and hard-to-find roses from specialty nurseries, and rose experts will be there to answer your questions. While supplies last, children can get a free rose plant courtesy of the Heritage Rose Group Bay Area. Along with the roses, there’s an array of arts & crafts and rose-related goodies for you to view and buy as gifts for someone special or for yourself!
 Plus, while it lasts – a new batch of our sublime local honey. Many people swear by it to help their seasonal allergies.
